

Integration types
Accounting
CRM
SFTP
Connect an accounting integration
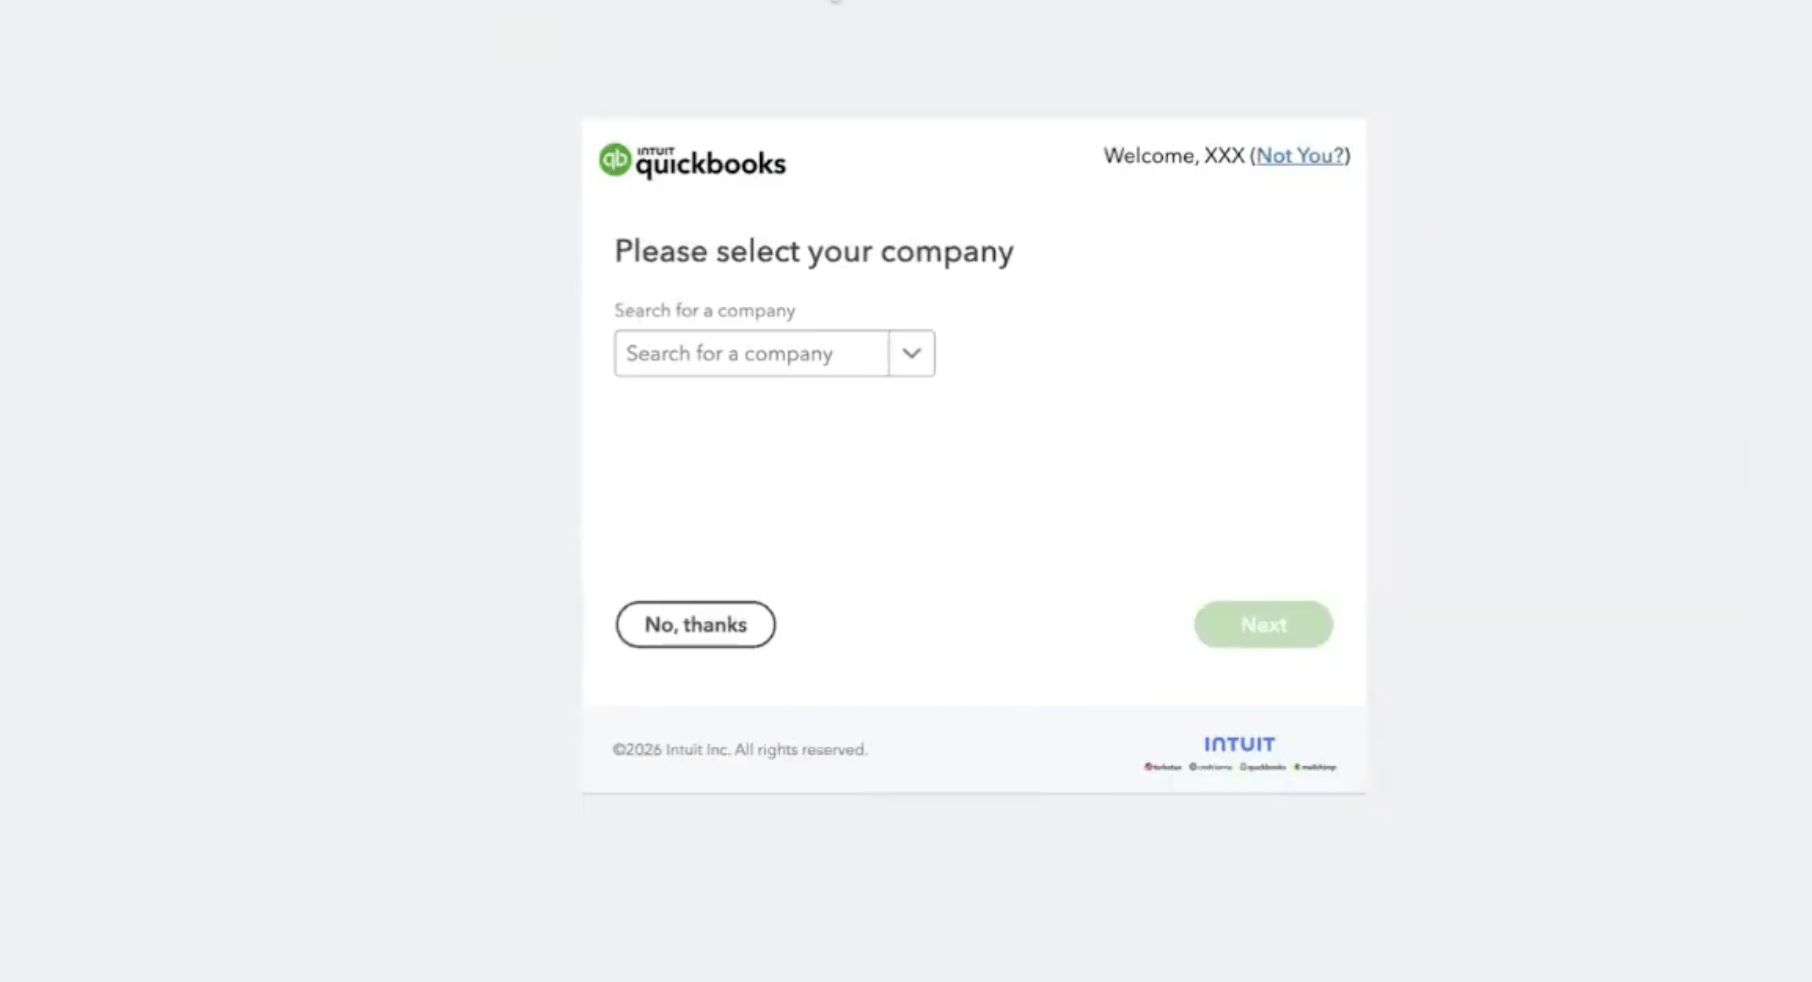
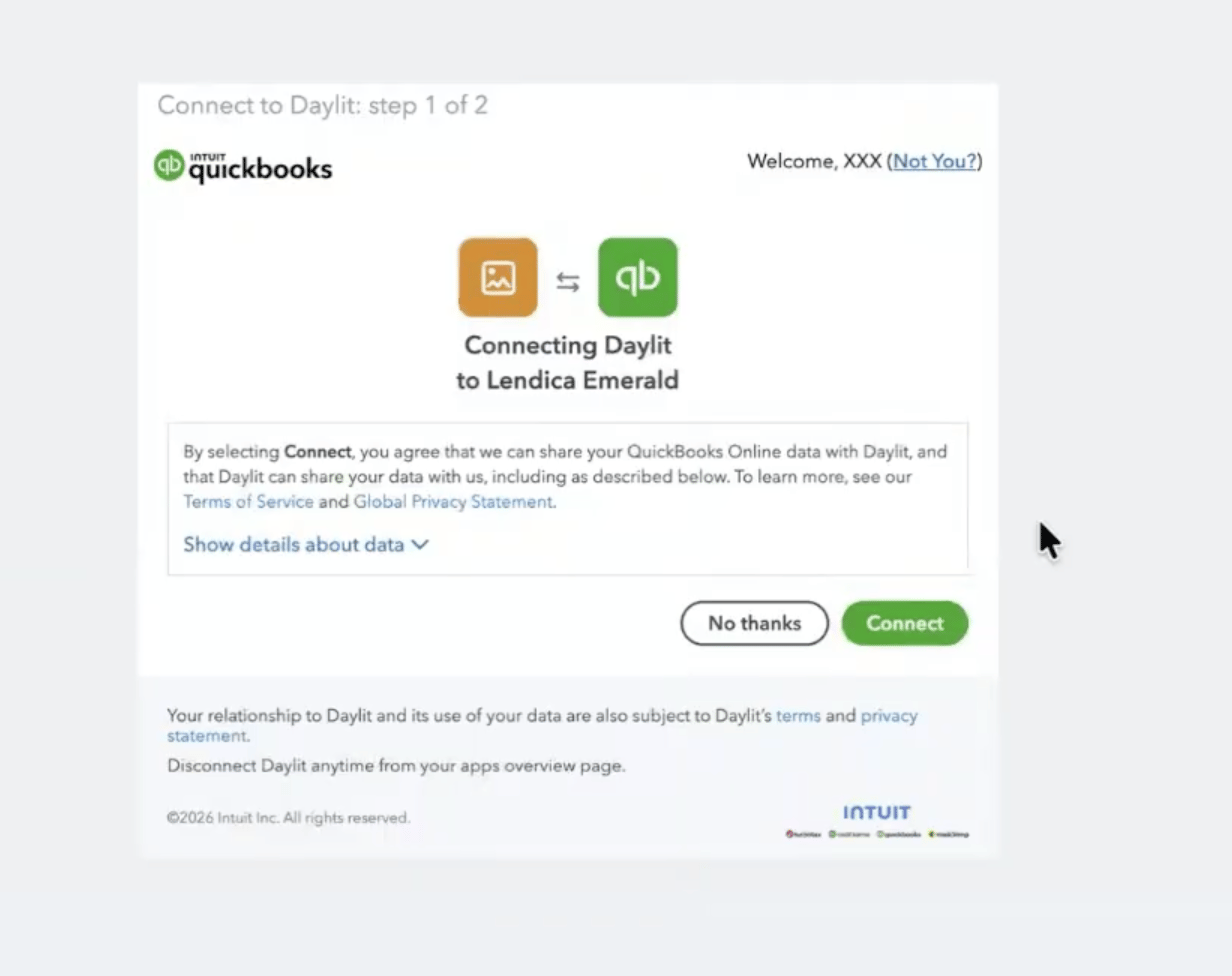
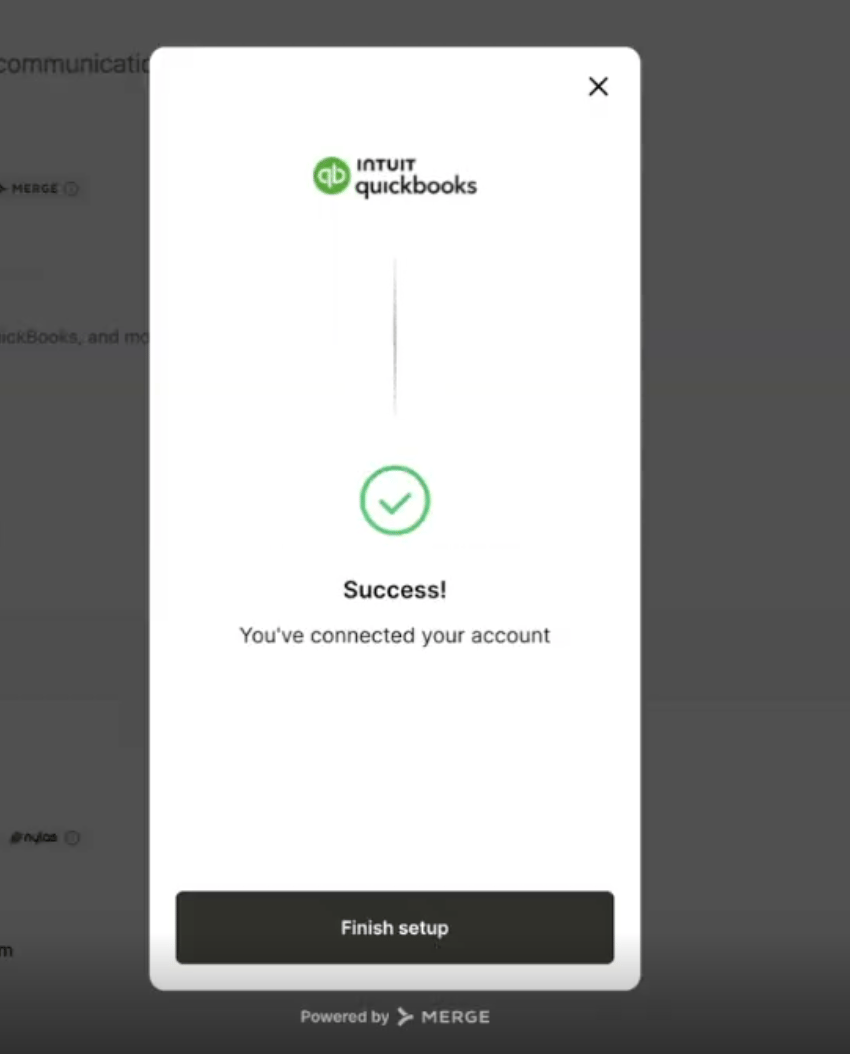
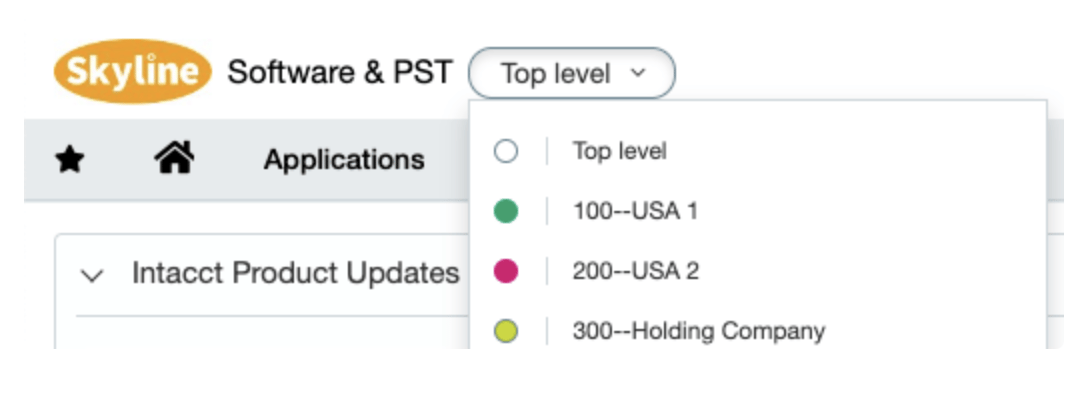
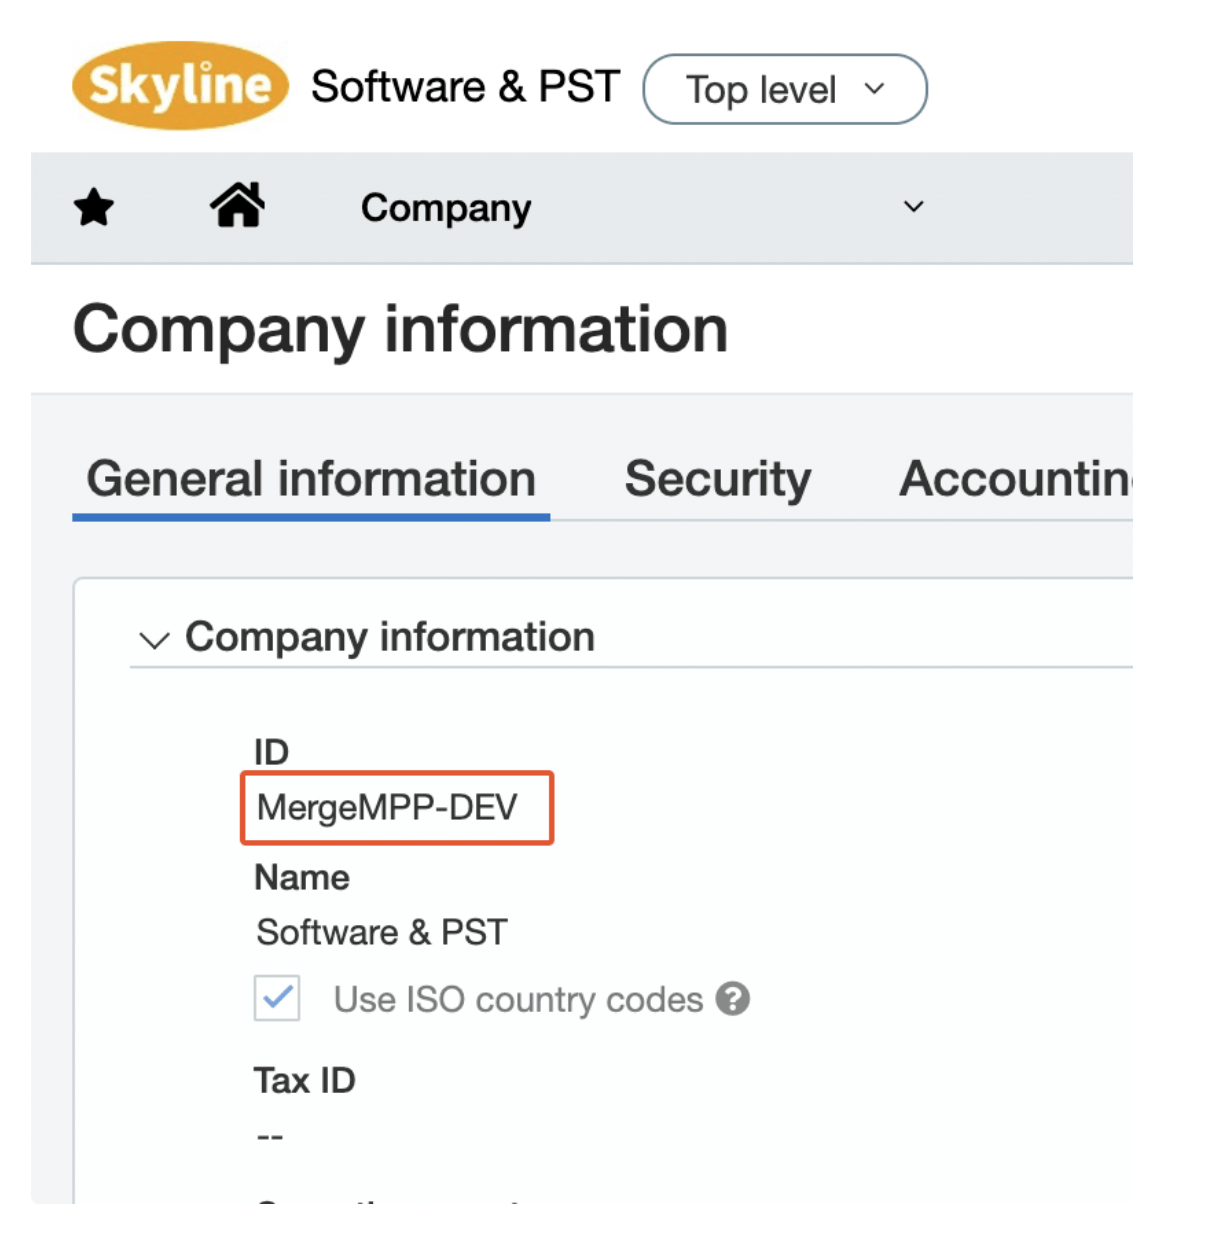
Most accounting platforms connect through Merge with a standard OAuth flow. NetSuite, QuickBooks, and Sage Intacct require additional setup — use the platform-specific tabs below. For all other supported platforms, follow the Other platforms tab.- NetSuite
- QuickBooks
- Sage Intacct
- Other platforms
Step 1 — Start the connection in Daylit
Step 1 — Start the connection in Daylit
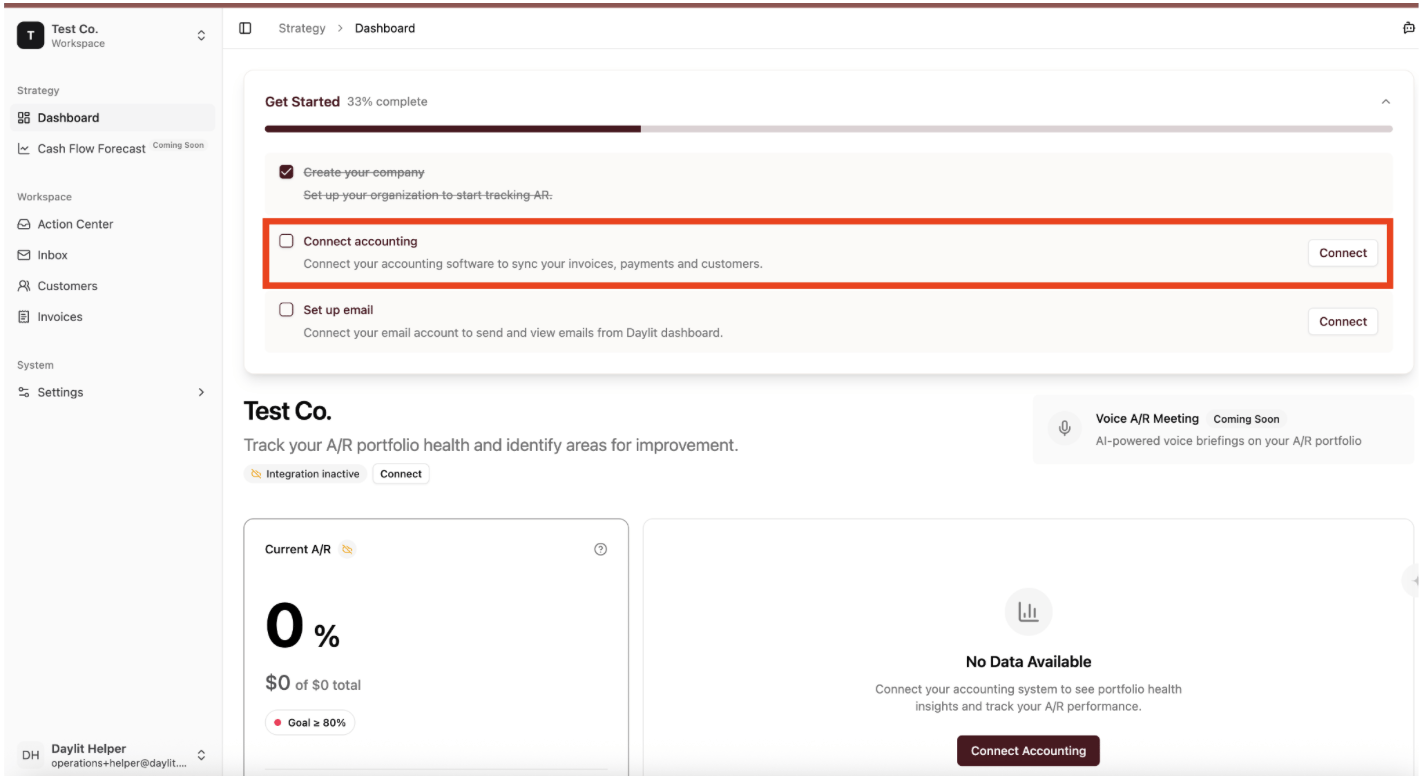
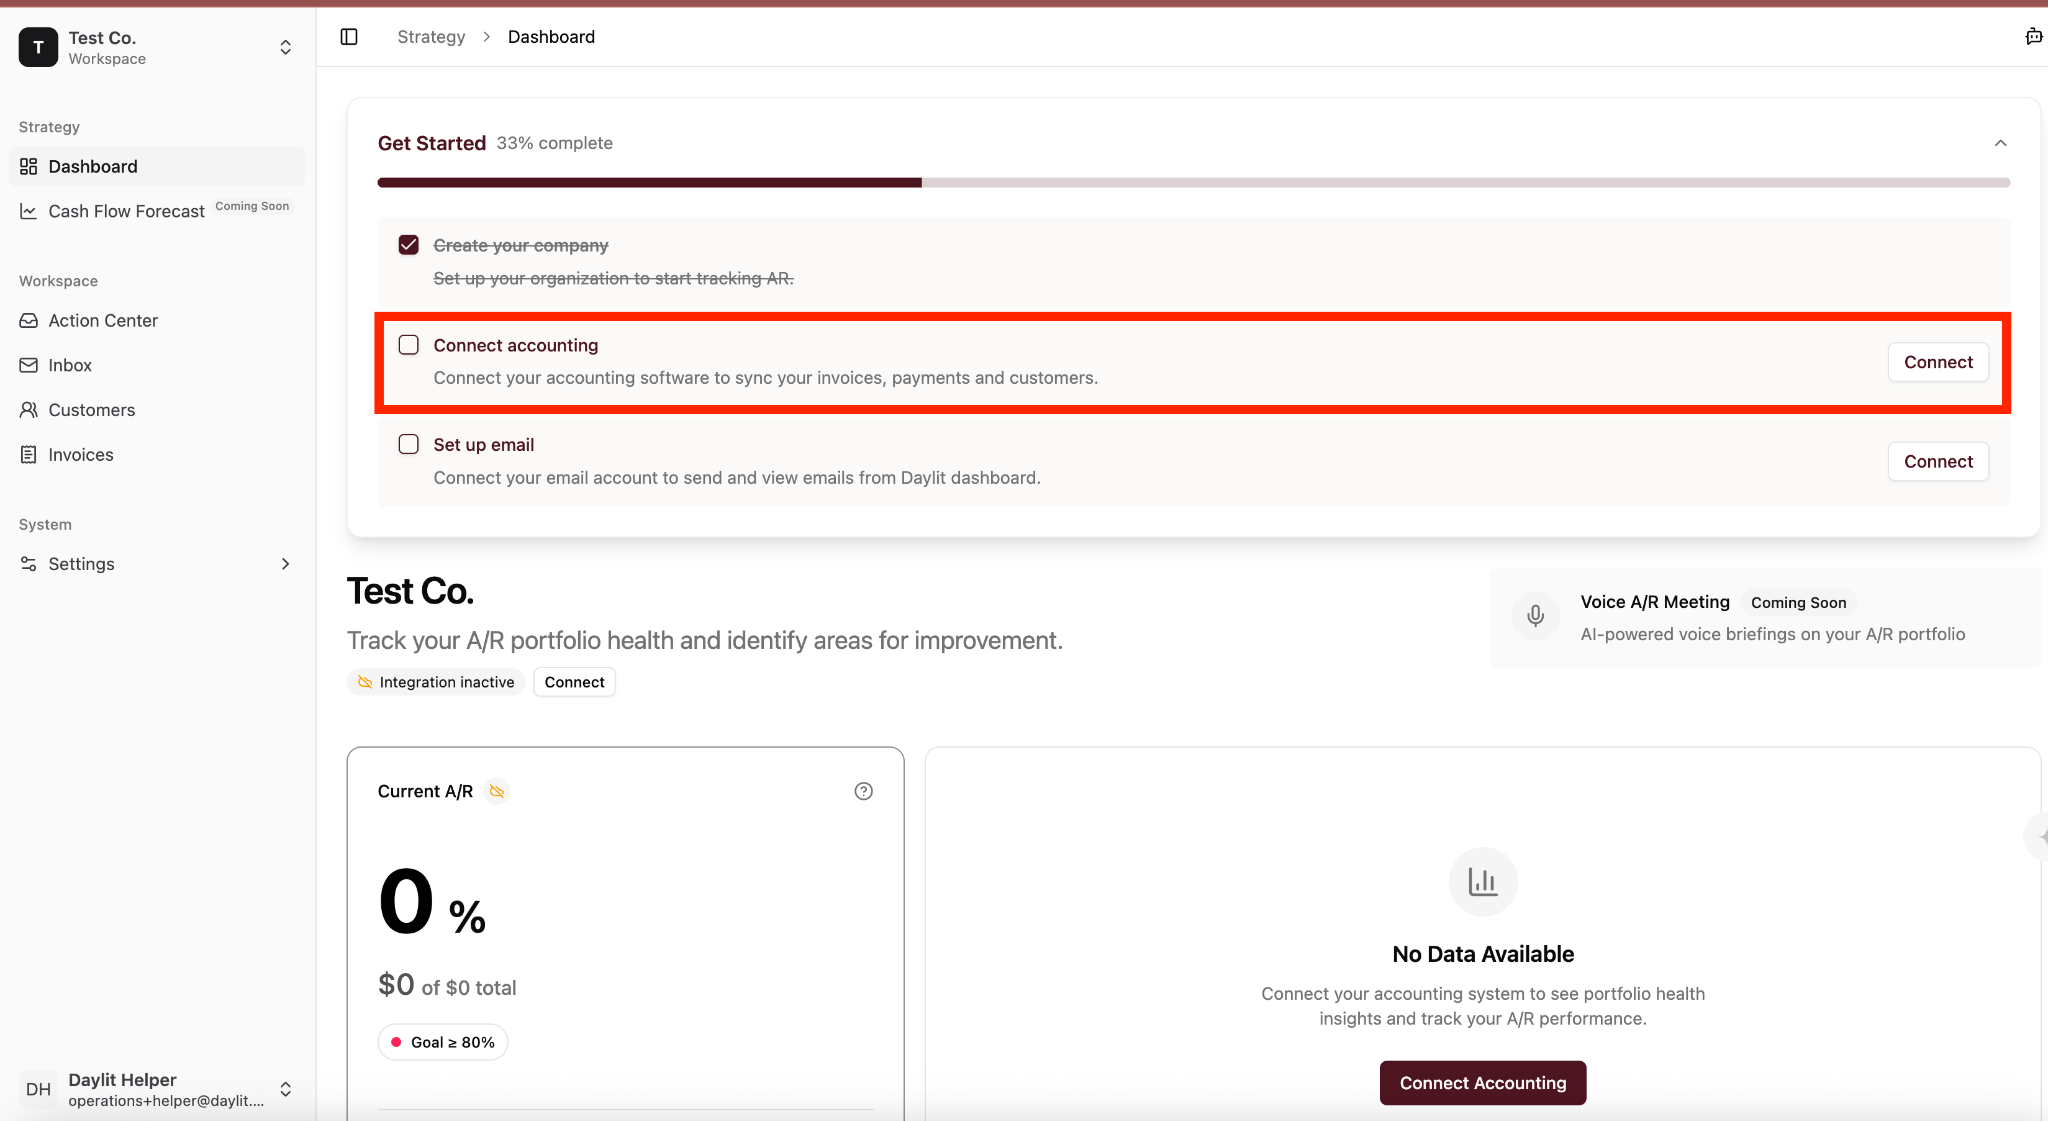
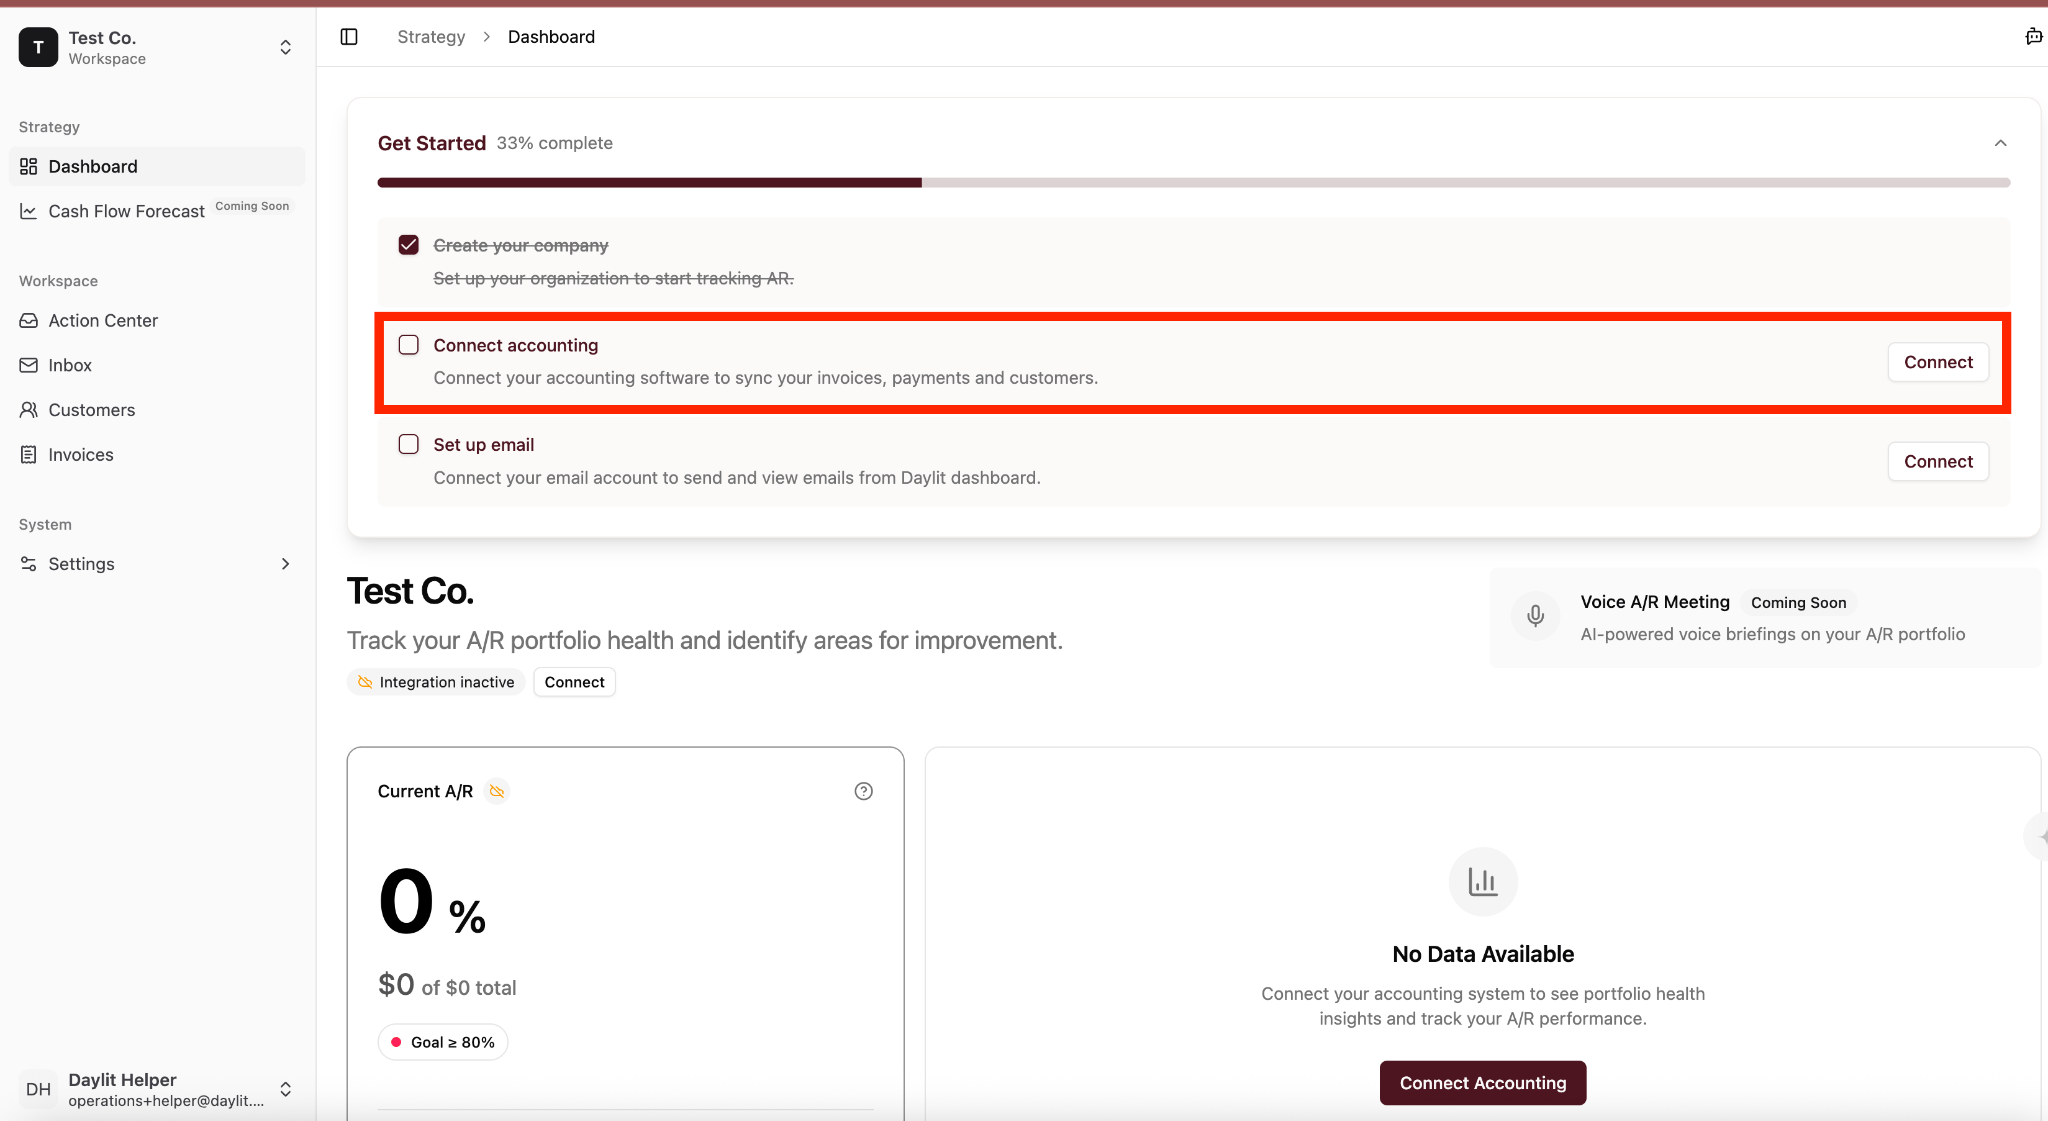
- On the Daylit platform, click Connect in the Connect accounting section.
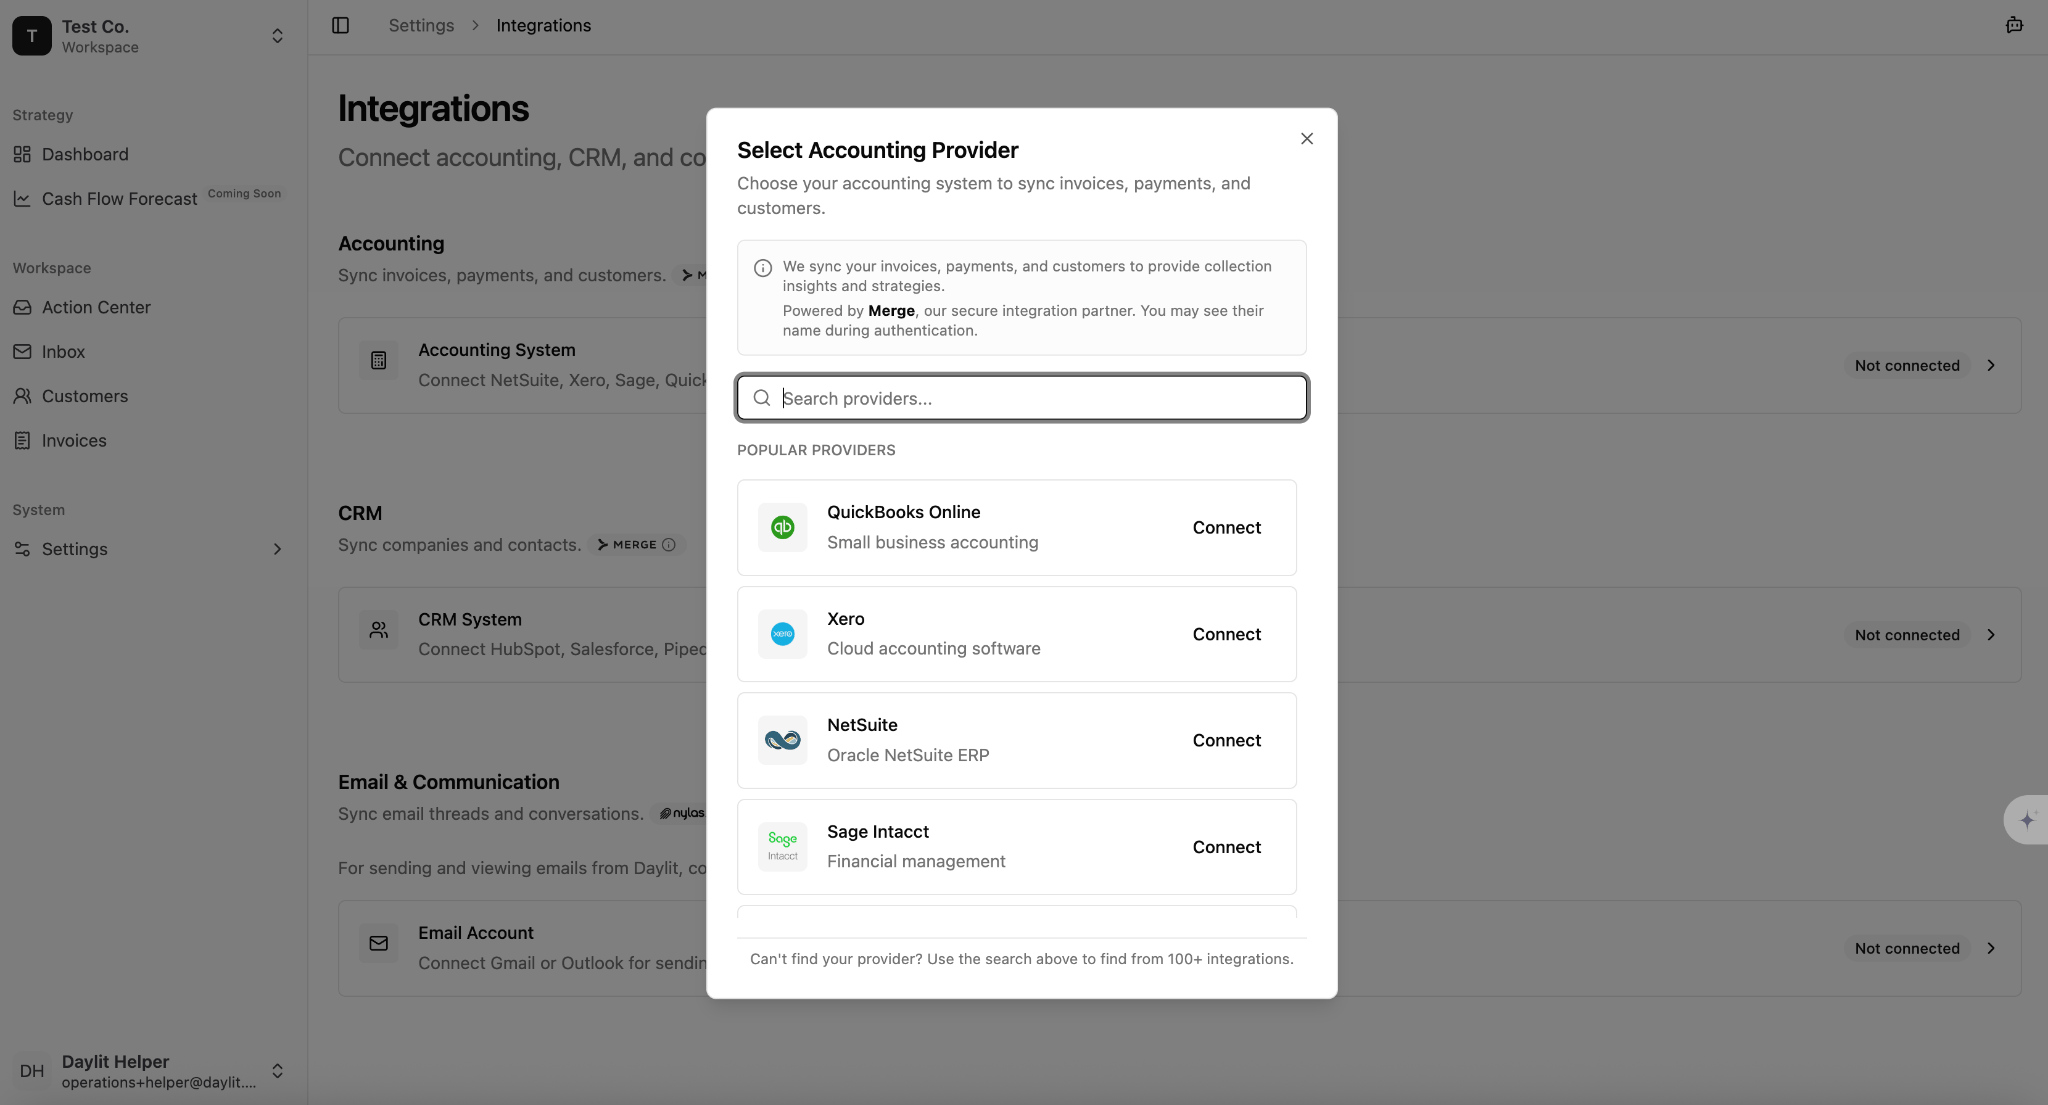
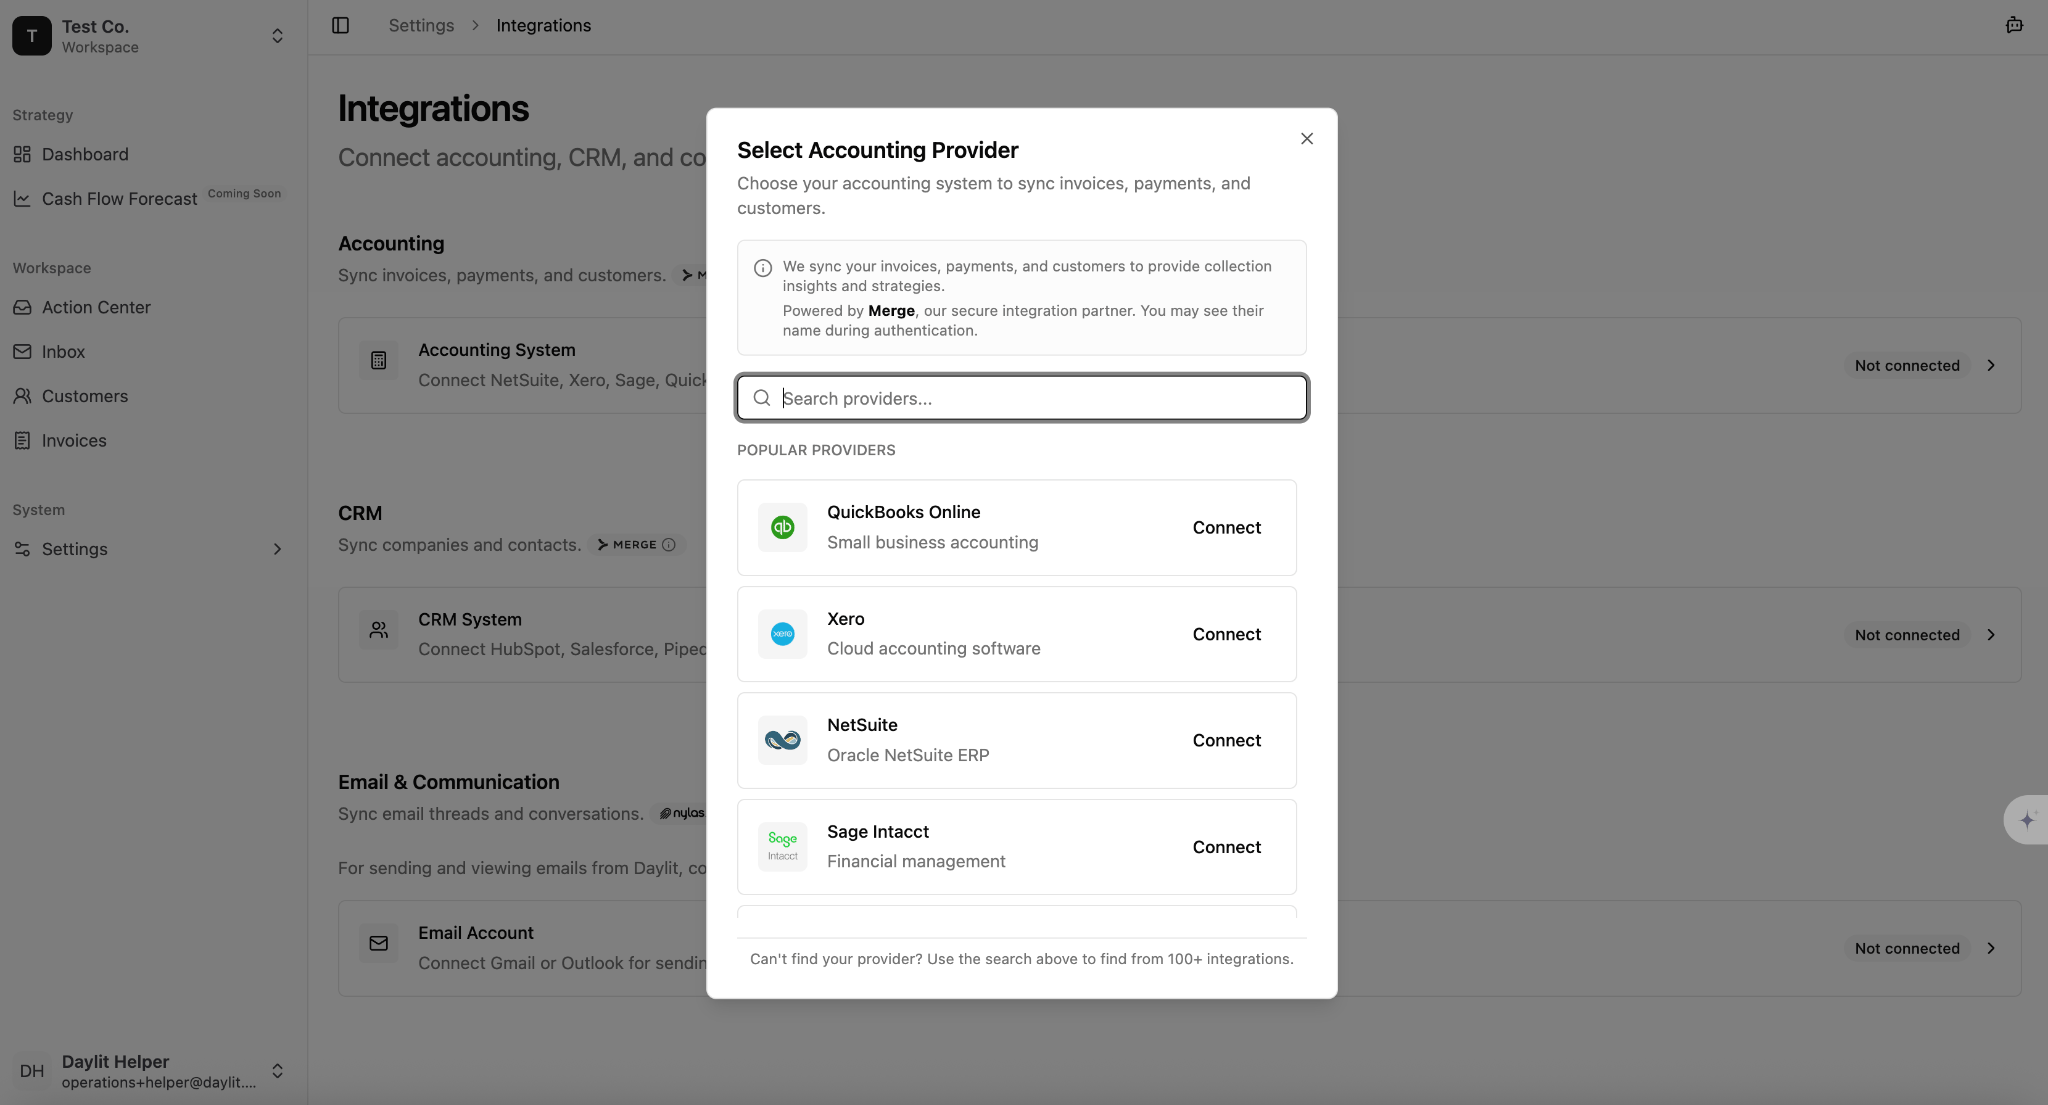
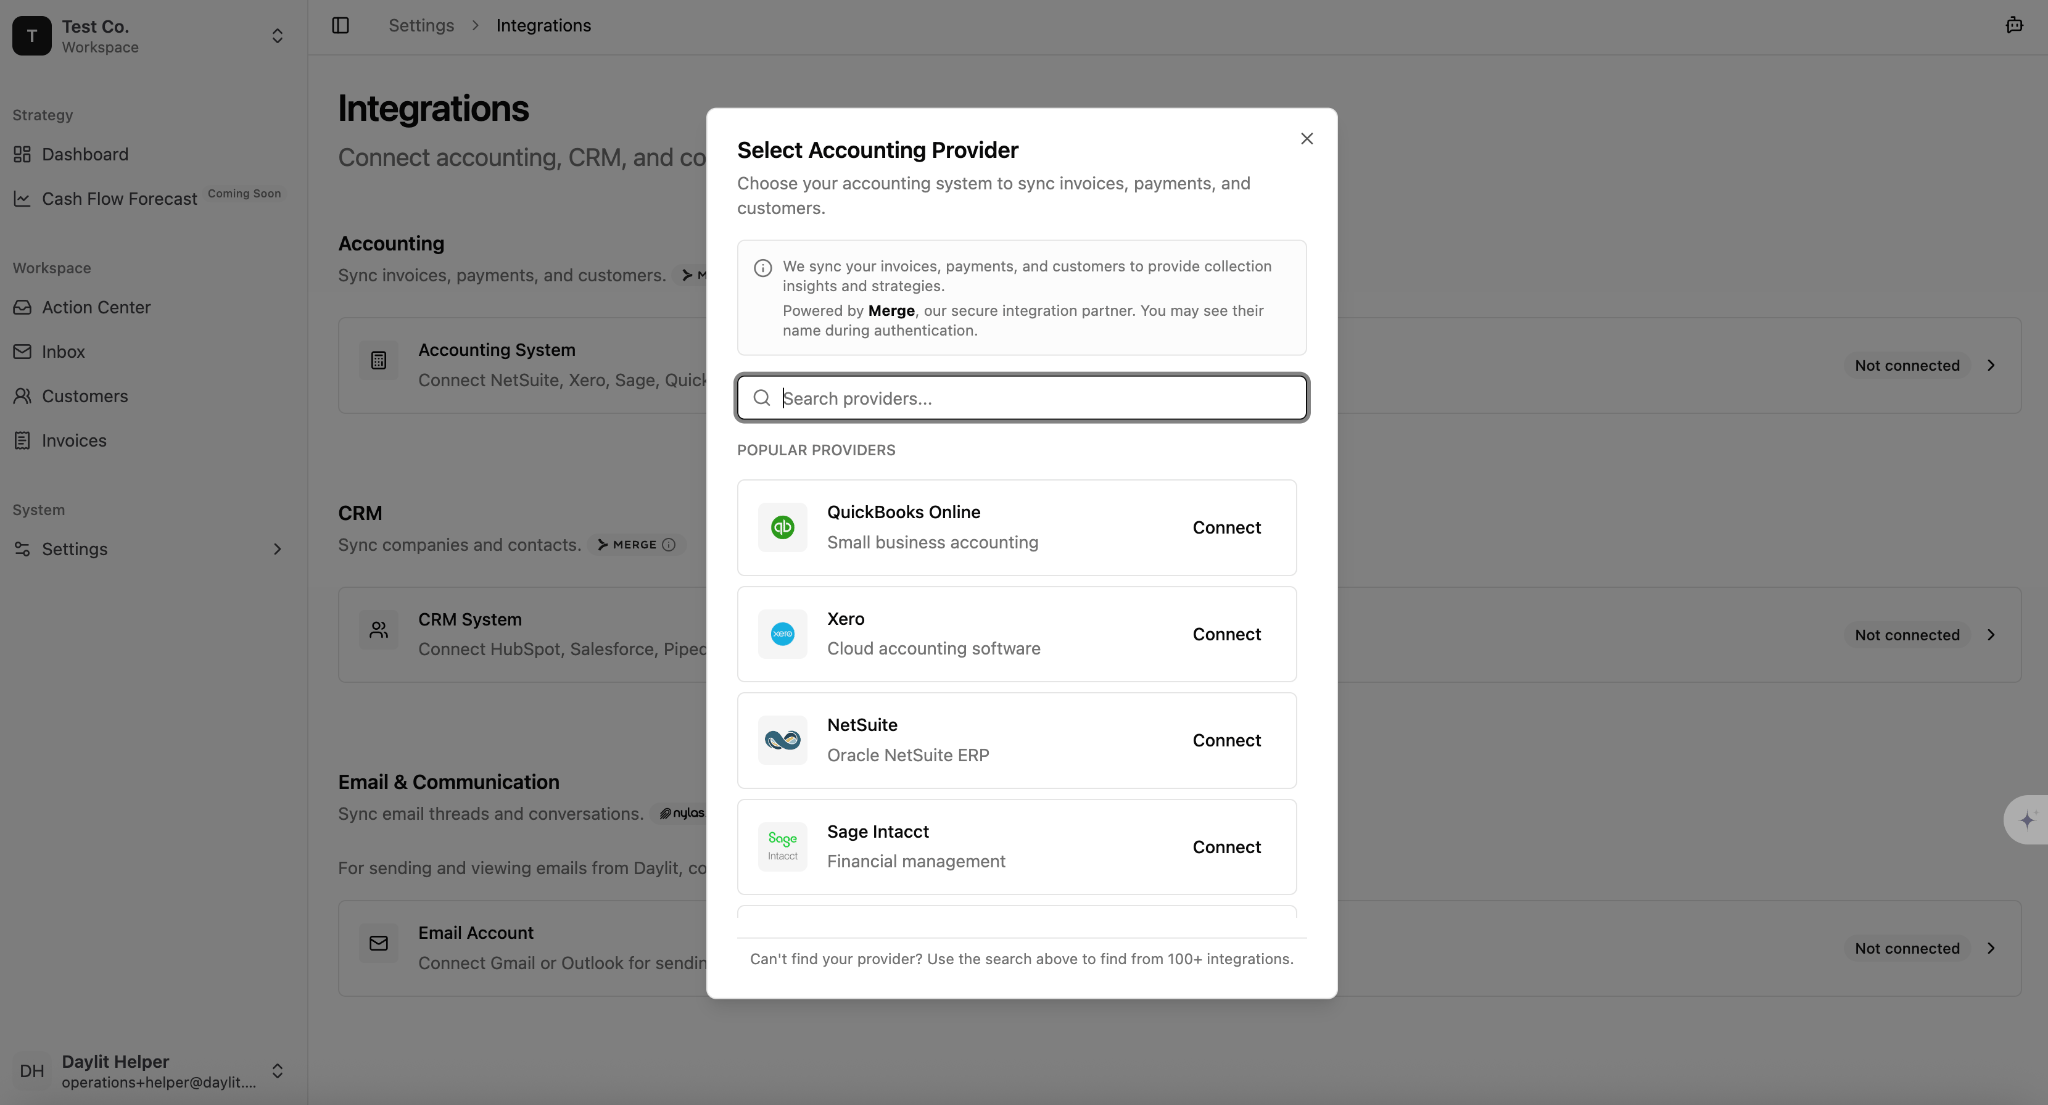
- Find NetSuite in the pop-up list or use the search bar, then click Connect.
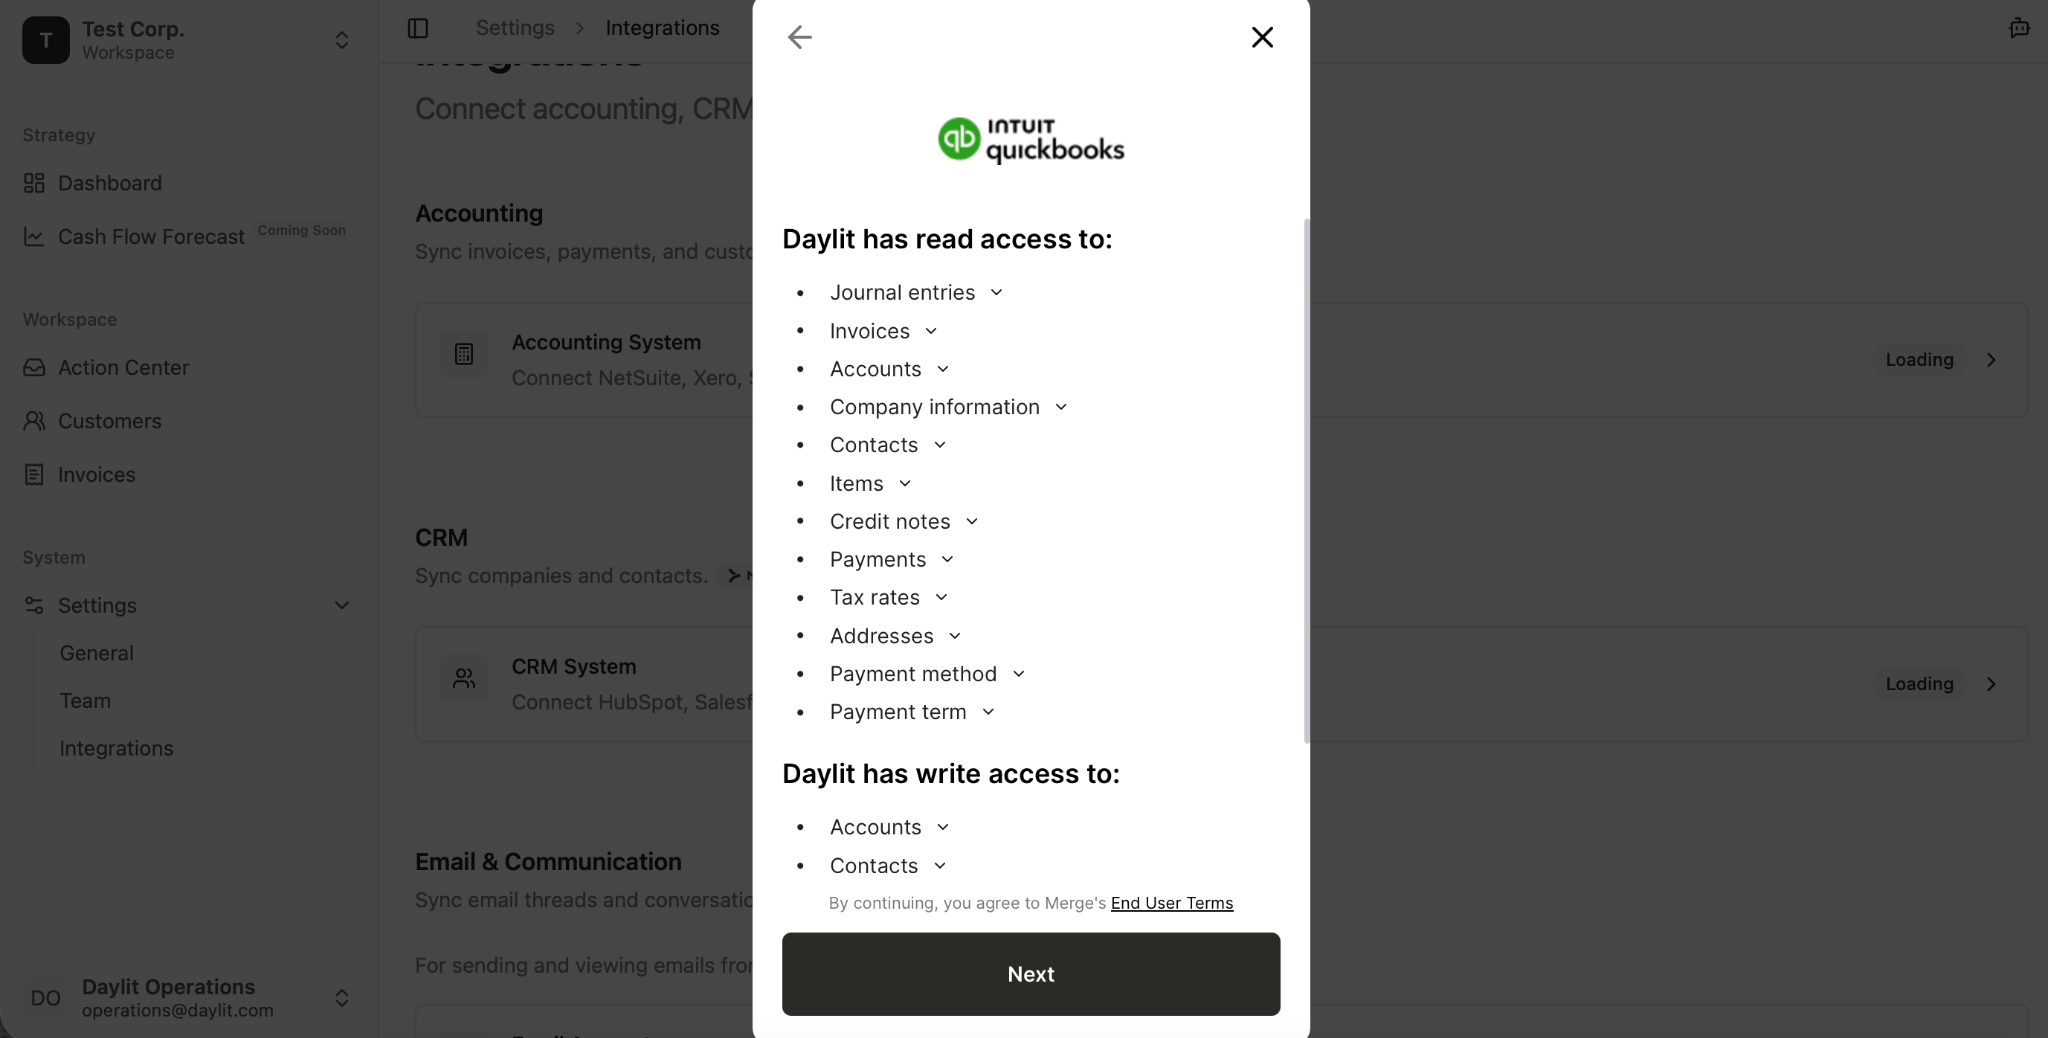
- Click Next to grant Daylit access to your ERP data.
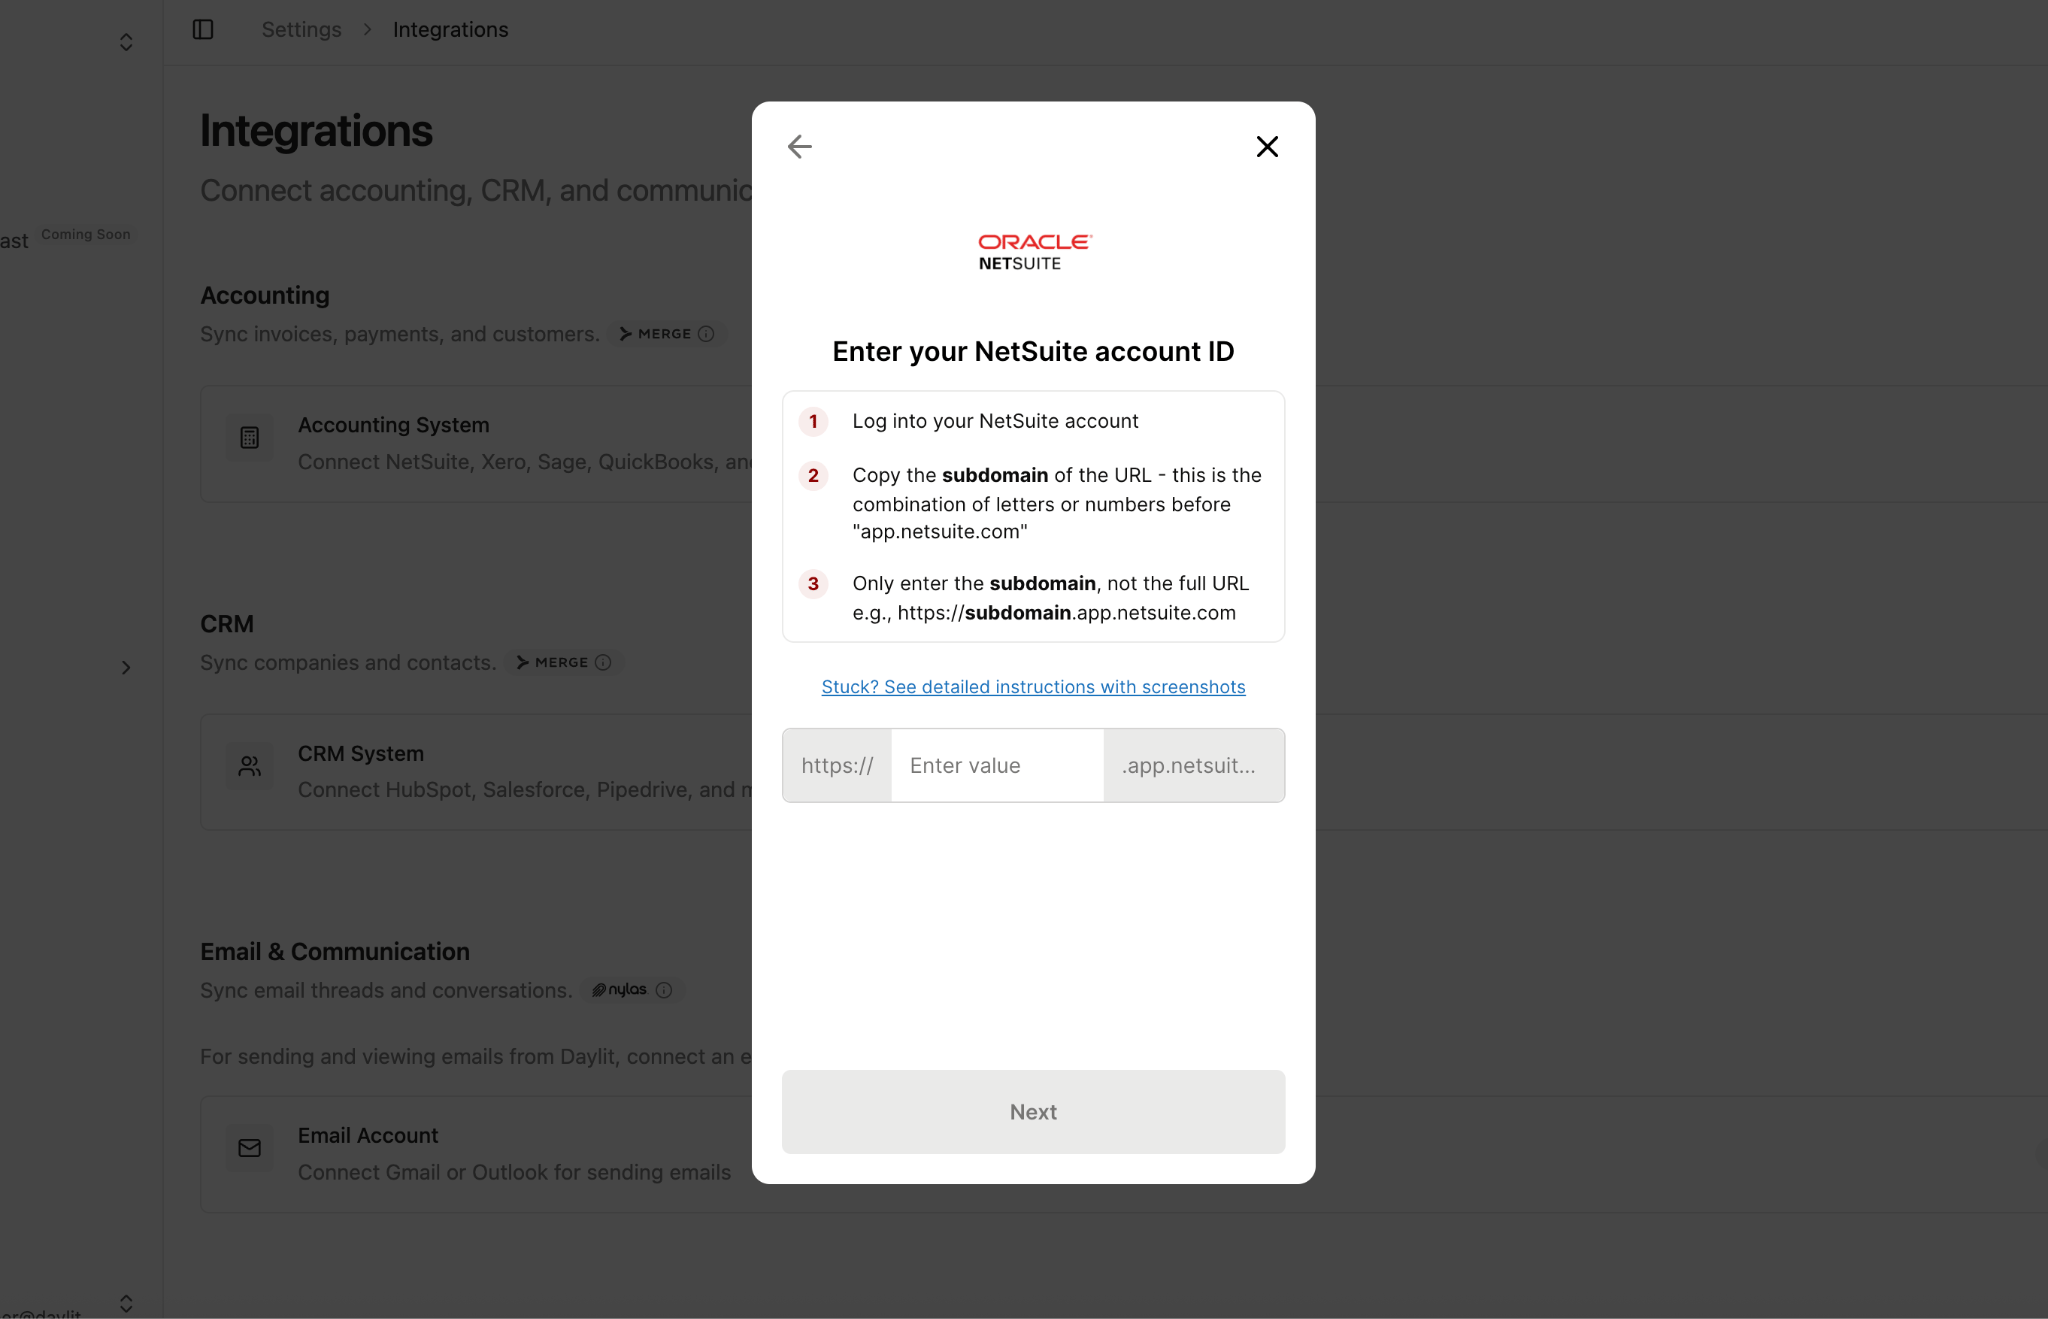
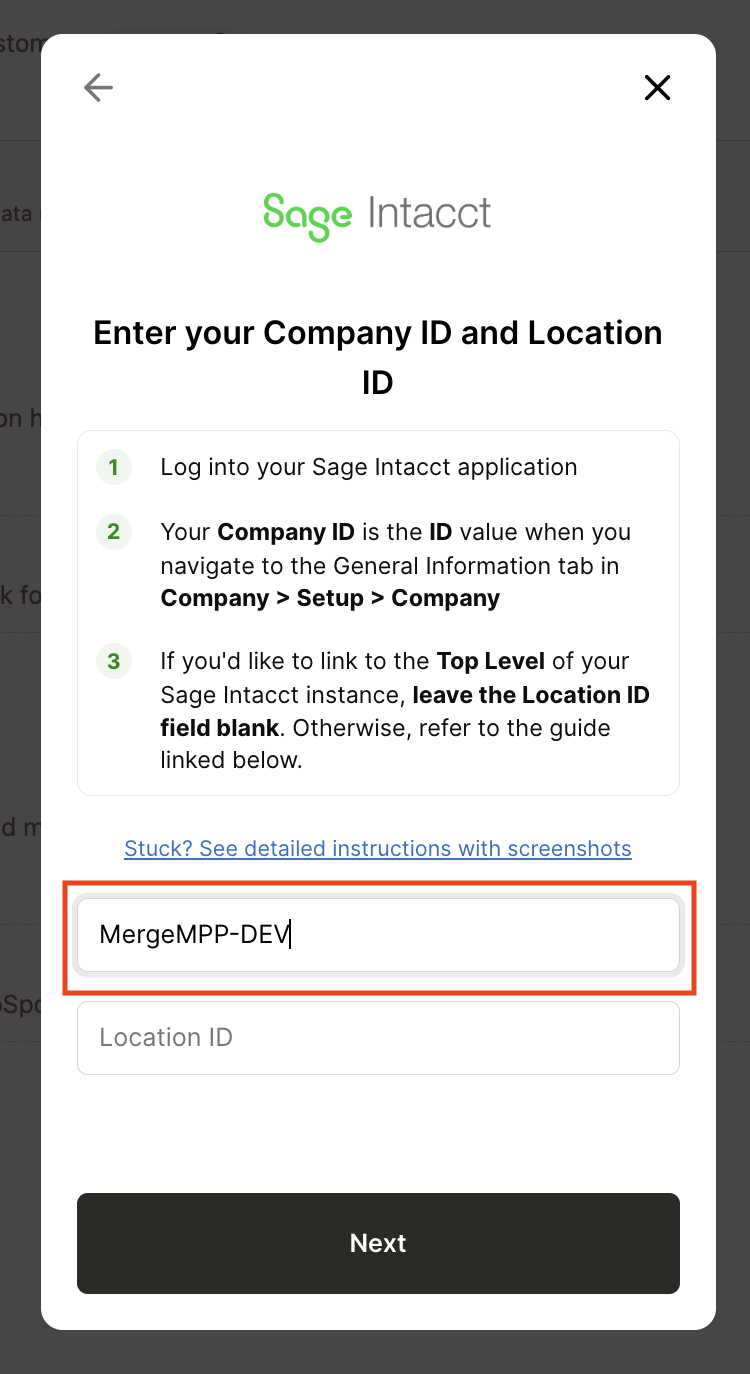
- When prompted, enter your NetSuite subdomain.
Step 2 — Enable SuiteCloud features
Step 2 — Enable SuiteCloud features
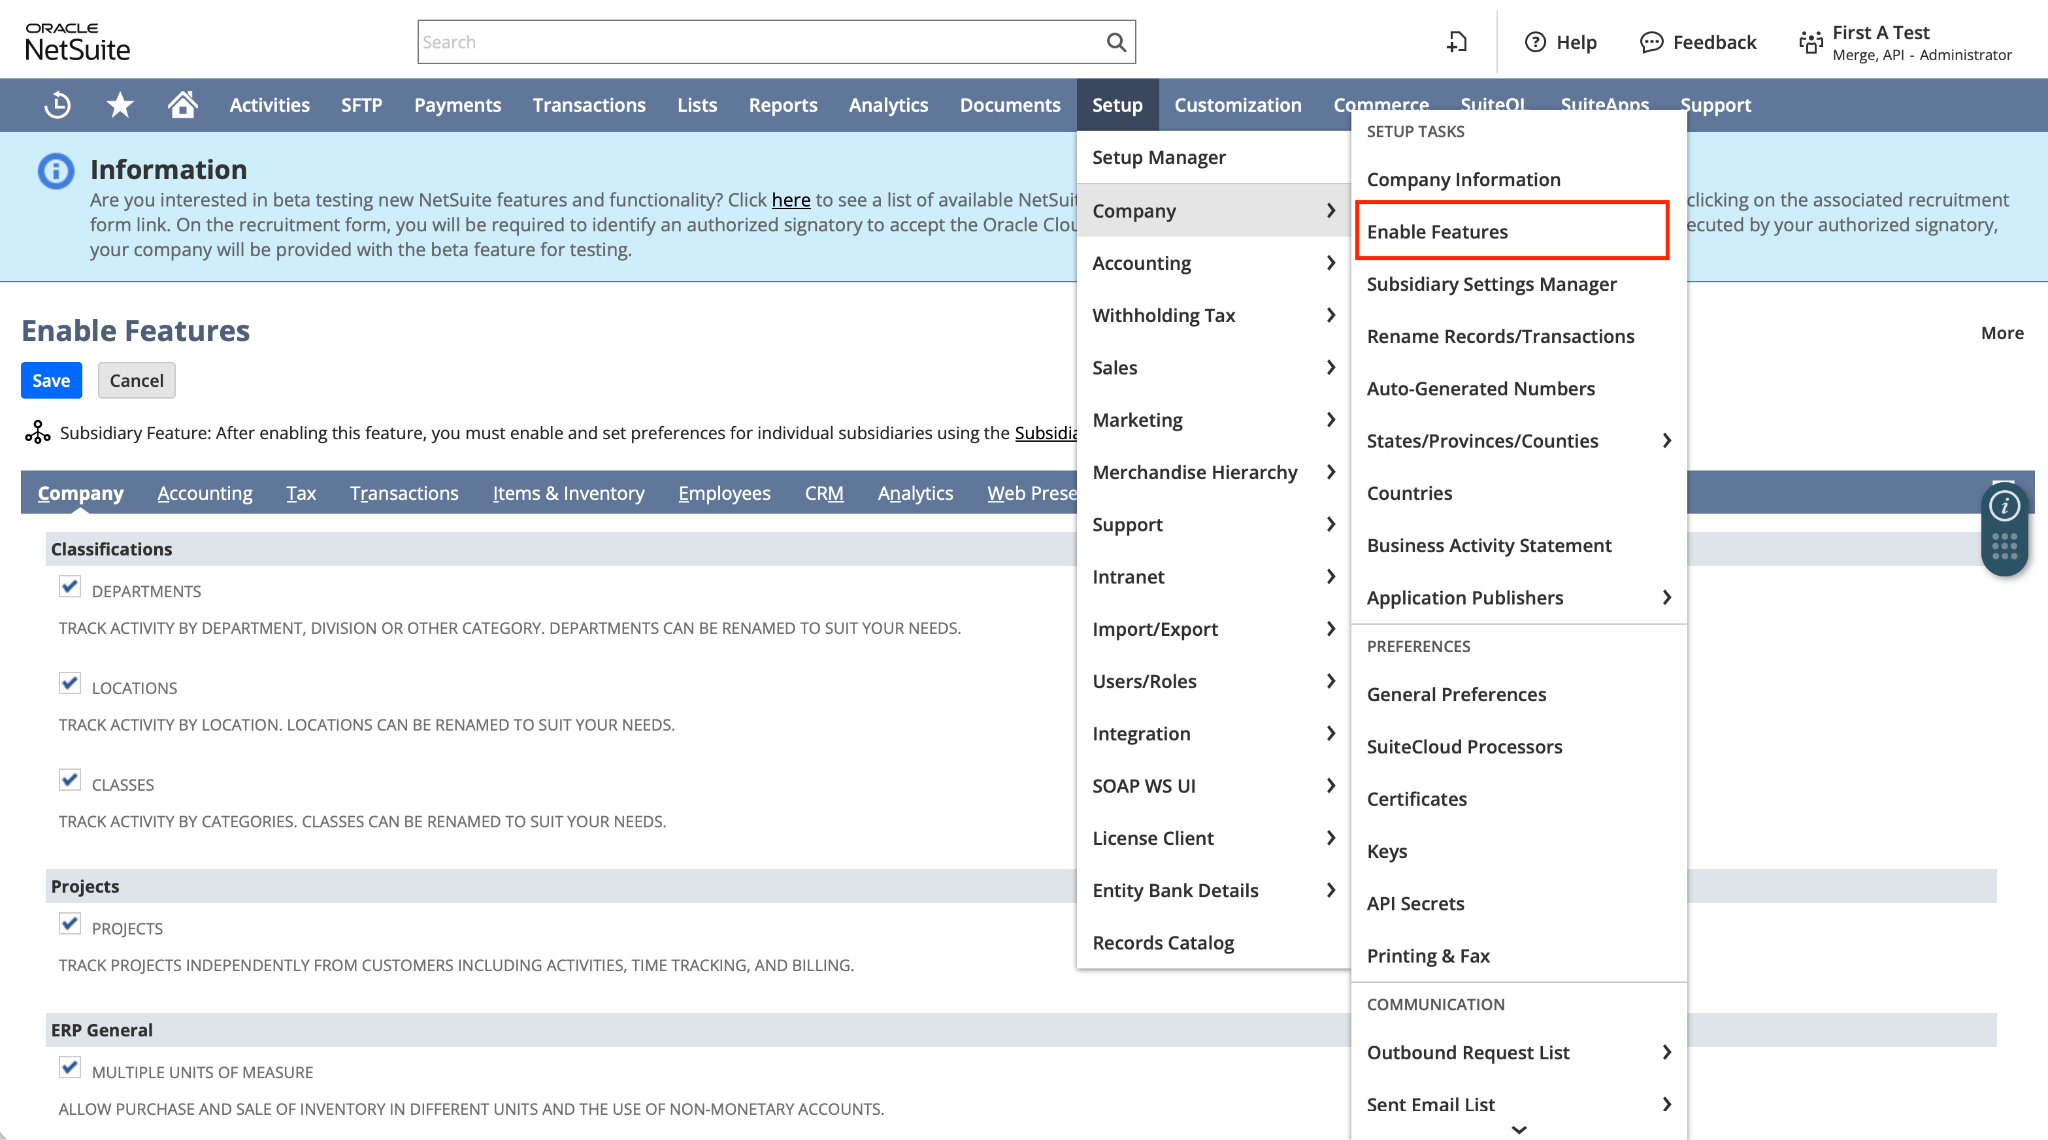
- In NetSuite, go to Setup → Company → Enable Features.
- Open the SuiteCloud tab.
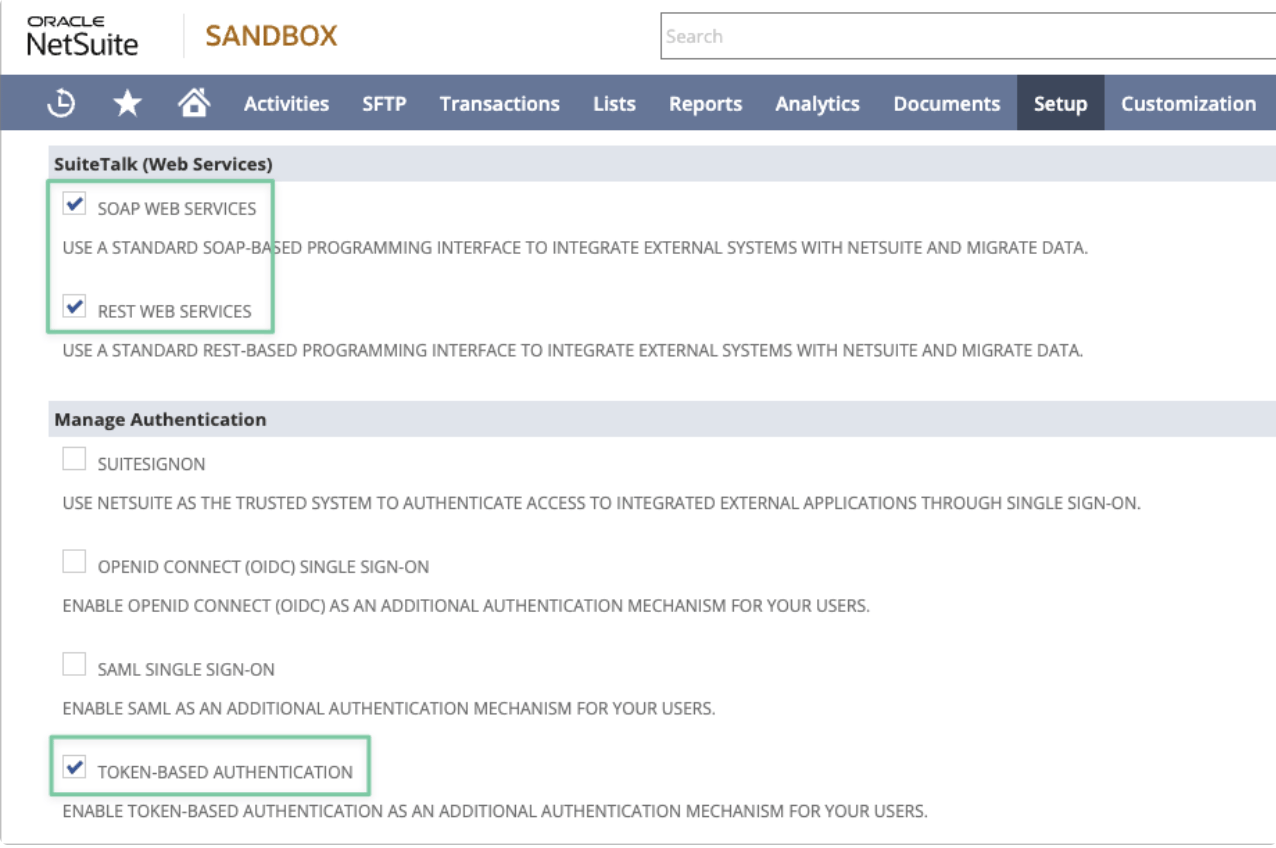
- Enable SOAP Web Services, REST Web Services, and Token-Based Authentication.
- Click Save.
Step 3 — Install the AccountLink NetSuite bundle
Step 3 — Install the AccountLink NetSuite bundle
- In NetSuite, go to Customization → SuiteBundler → Search & Install Bundles.
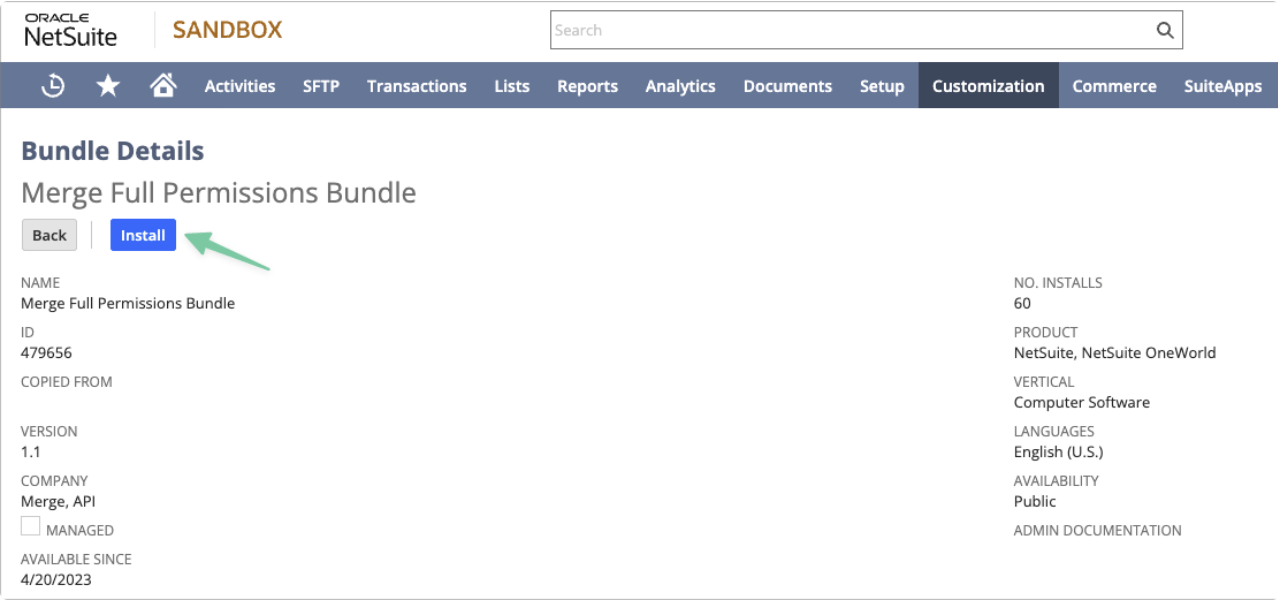
- Search for Merge Full Permission Bundle.
- Select the bundle from the results and click Install.
- Log out of NetSuite and log back in to ensure the bundle is fully installed.
Step 4 — Assign a user to the role
Step 4 — Assign a user to the role
- In NetSuite, go to Setup → Users → Manage Users.
- Select an existing user or create a new one.
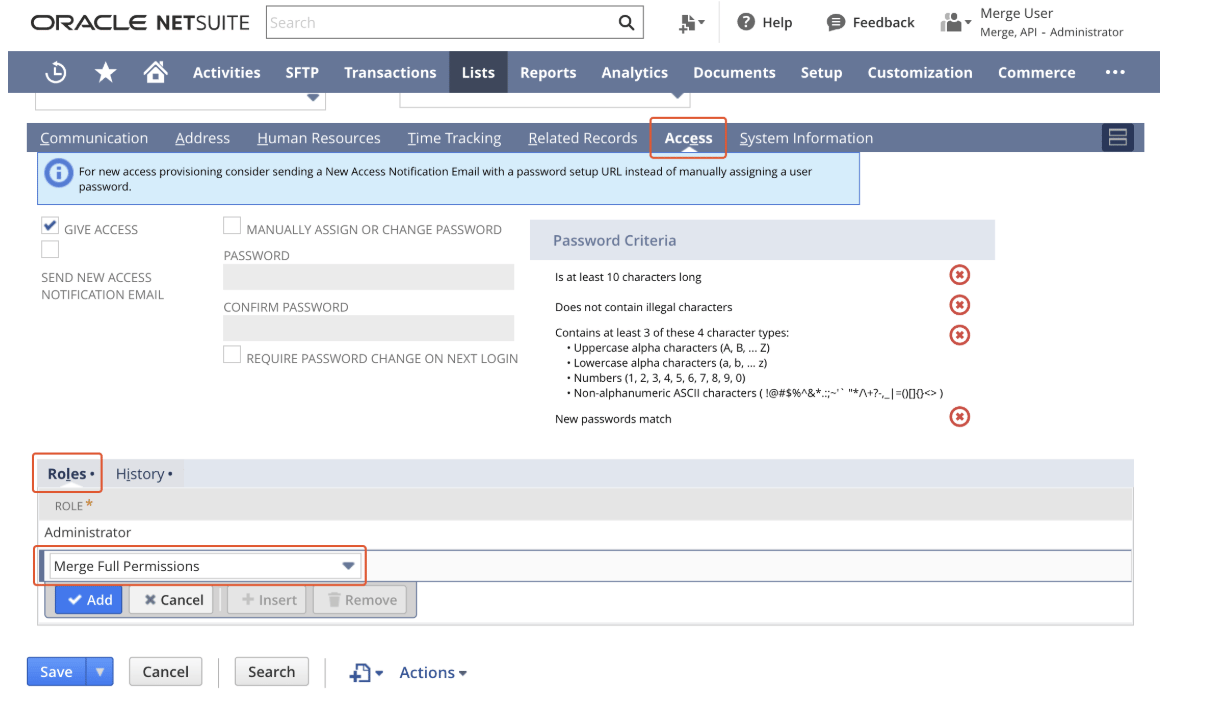
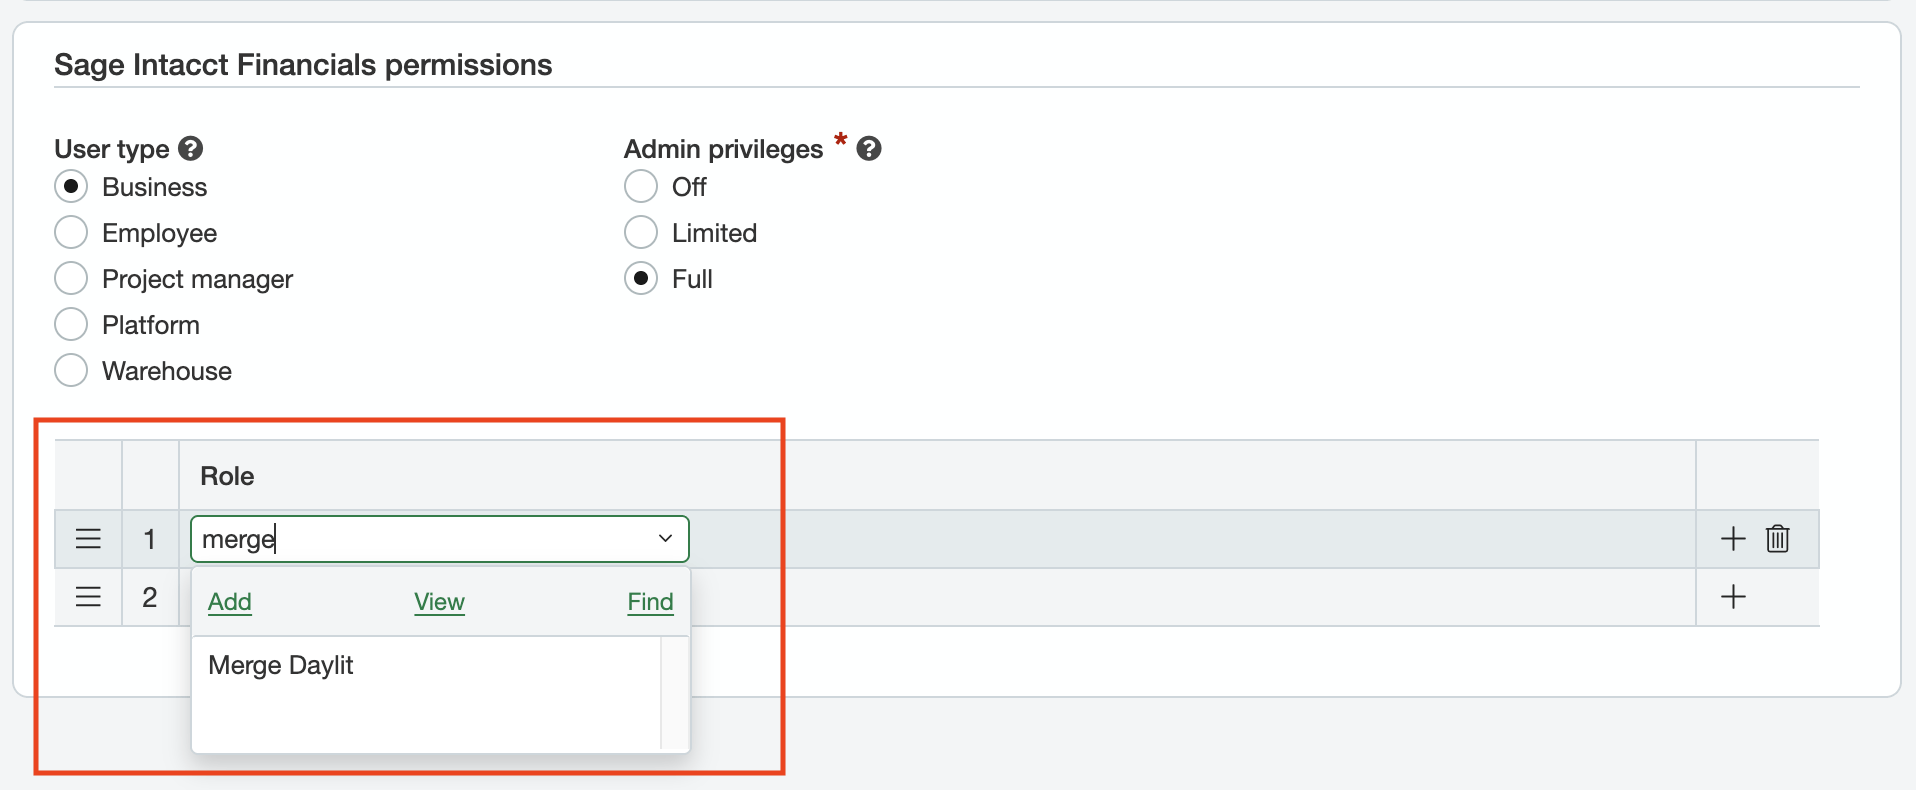
- Open the Roles tab, search for Merge Full Permission Bundle, select it, and save.
Step 5 — Create an integration for Consumer Key and Secret
Step 5 — Create an integration for Consumer Key and Secret
- In NetSuite, go to Setup → Integration → Manage Integration.
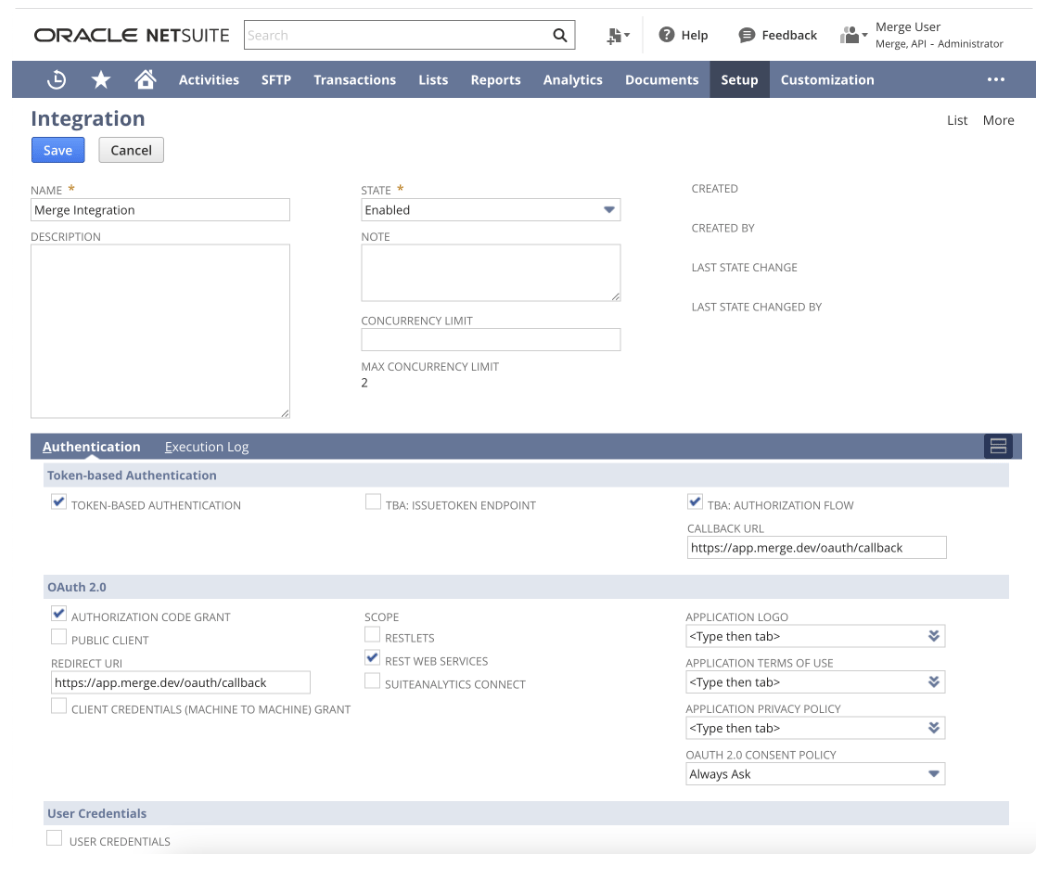
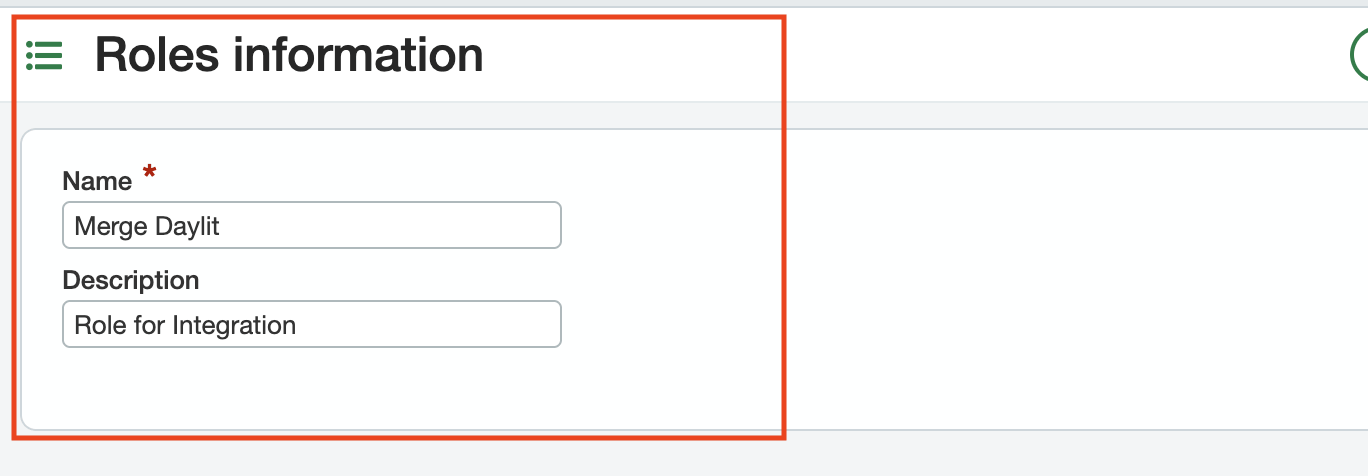
- Enter Daylit Merge as the name.
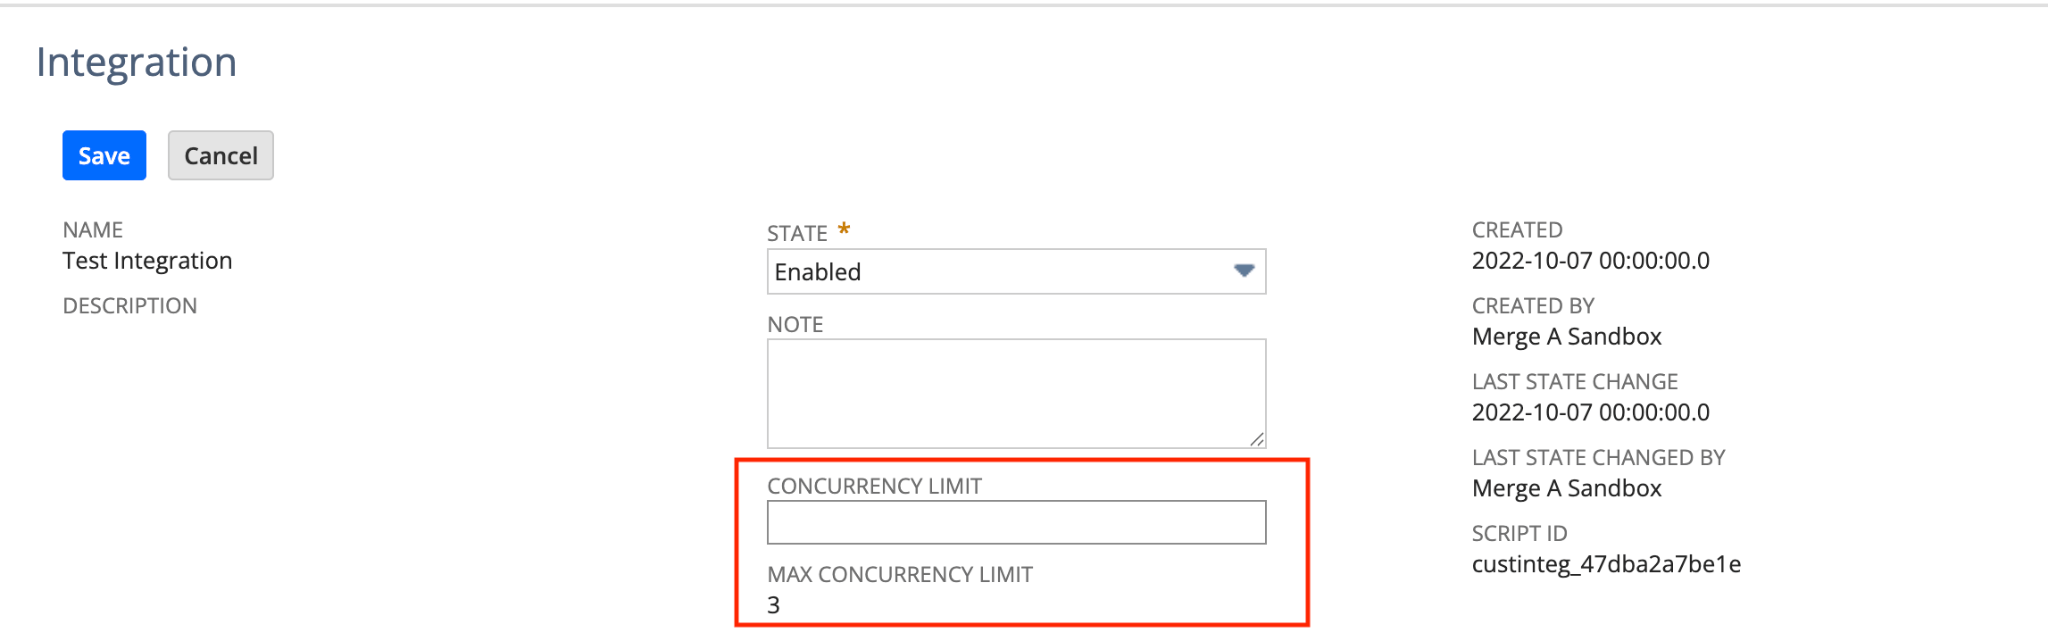
- Leave Currency Limit blank and set State to Enabled.
- Set Redirect URI and Callback URL to
https://app.merge.dev/oauth/callback. - Enable Token-Based Authentication, TBA: Authorization Flow, REST Web Services, and OAuth 2.0.
- Click Save.
- Copy the Client Credentials, Consumer Key, and Consumer Secret to the Daylit platform.
Step 6 — Create an access token
Step 6 — Create an access token
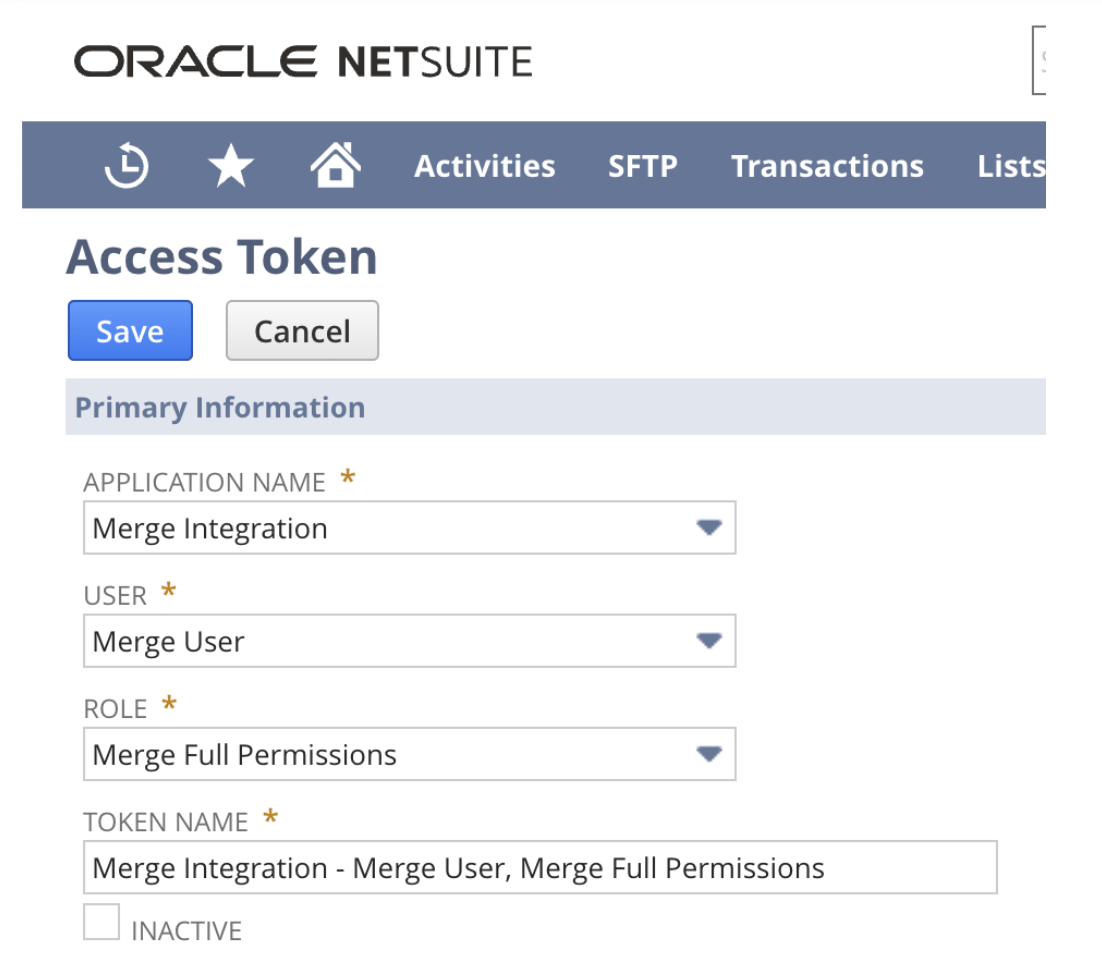
- In NetSuite, go to Setup → User/Roles → Access Tokens → New.
- Fill in:
- Application name: Daylit Merge
- User: Your admin user’s name
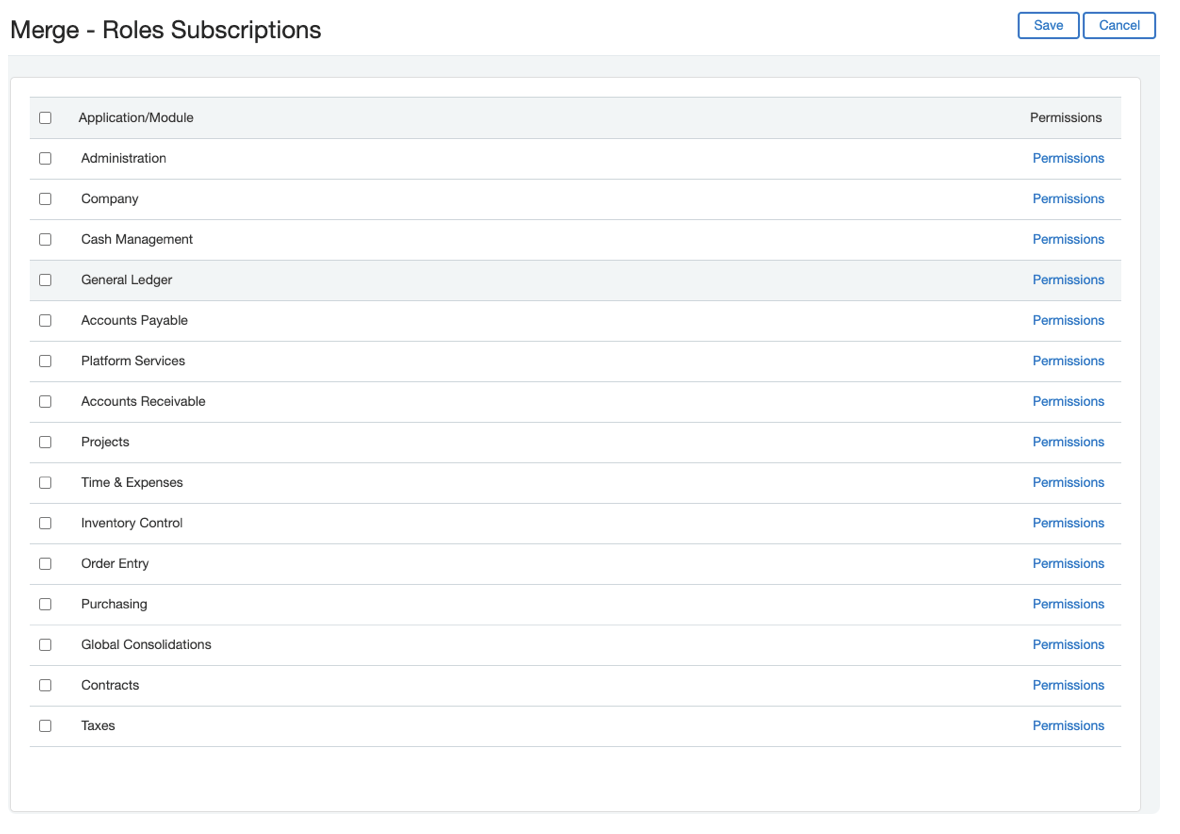
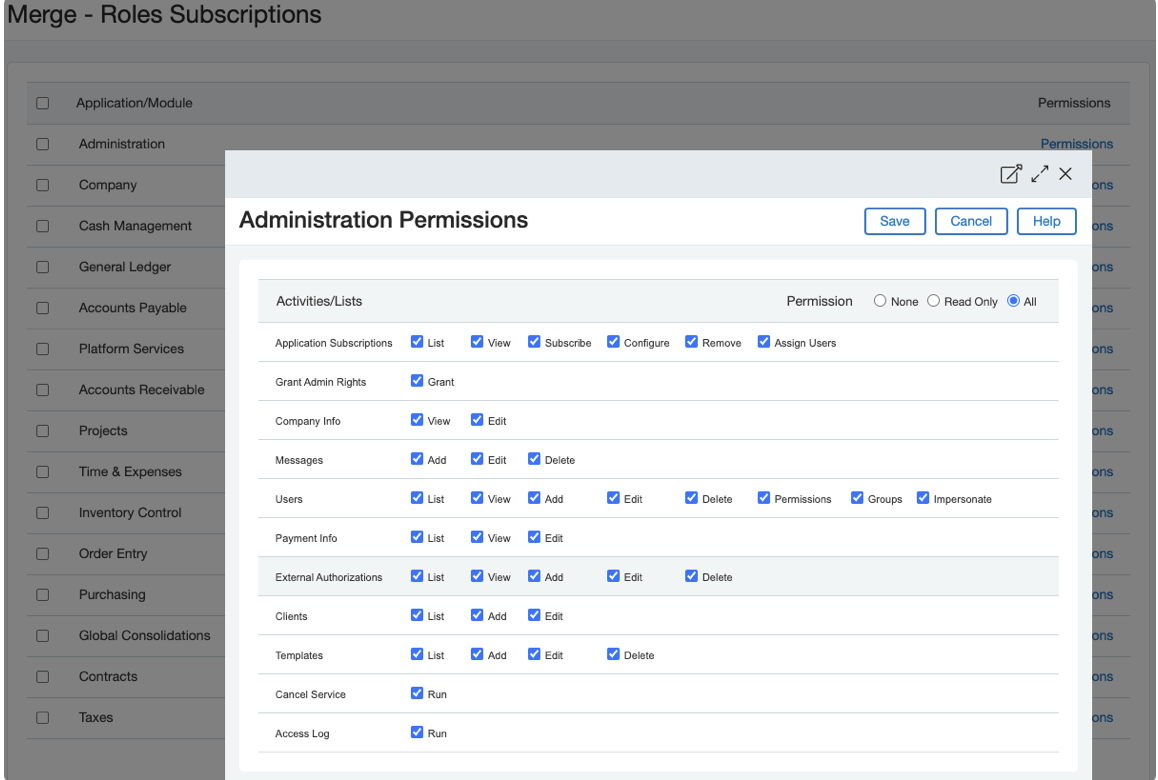
- Role: Merge Full Permissions
- Token name: Daylit Merge — [name]
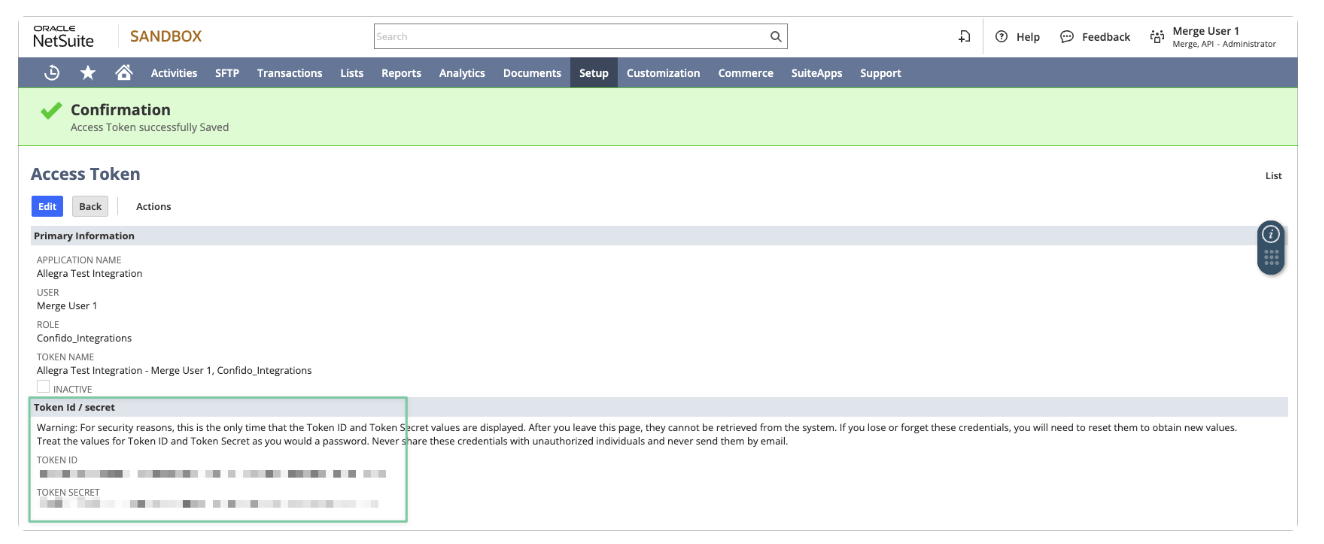
- Click Save.
- Copy the token details to the Daylit platform.
Step 7 — Configure integration governance
Step 7 — Configure integration governance
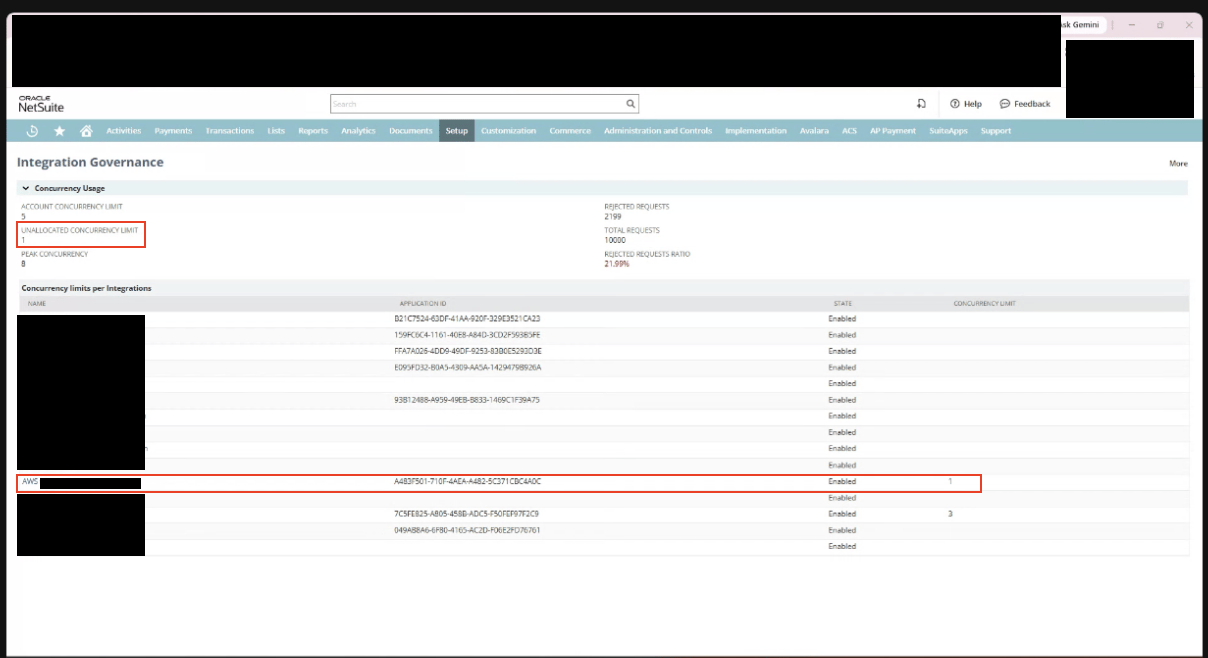
- In NetSuite, go to Setup → Integration → Integration Governance.
- Review Account Concurrency Limit and Unallocated Concurrency Limit.
- Confirm Unallocated Concurrency Limit is 3 or greater. If it is less than 3:
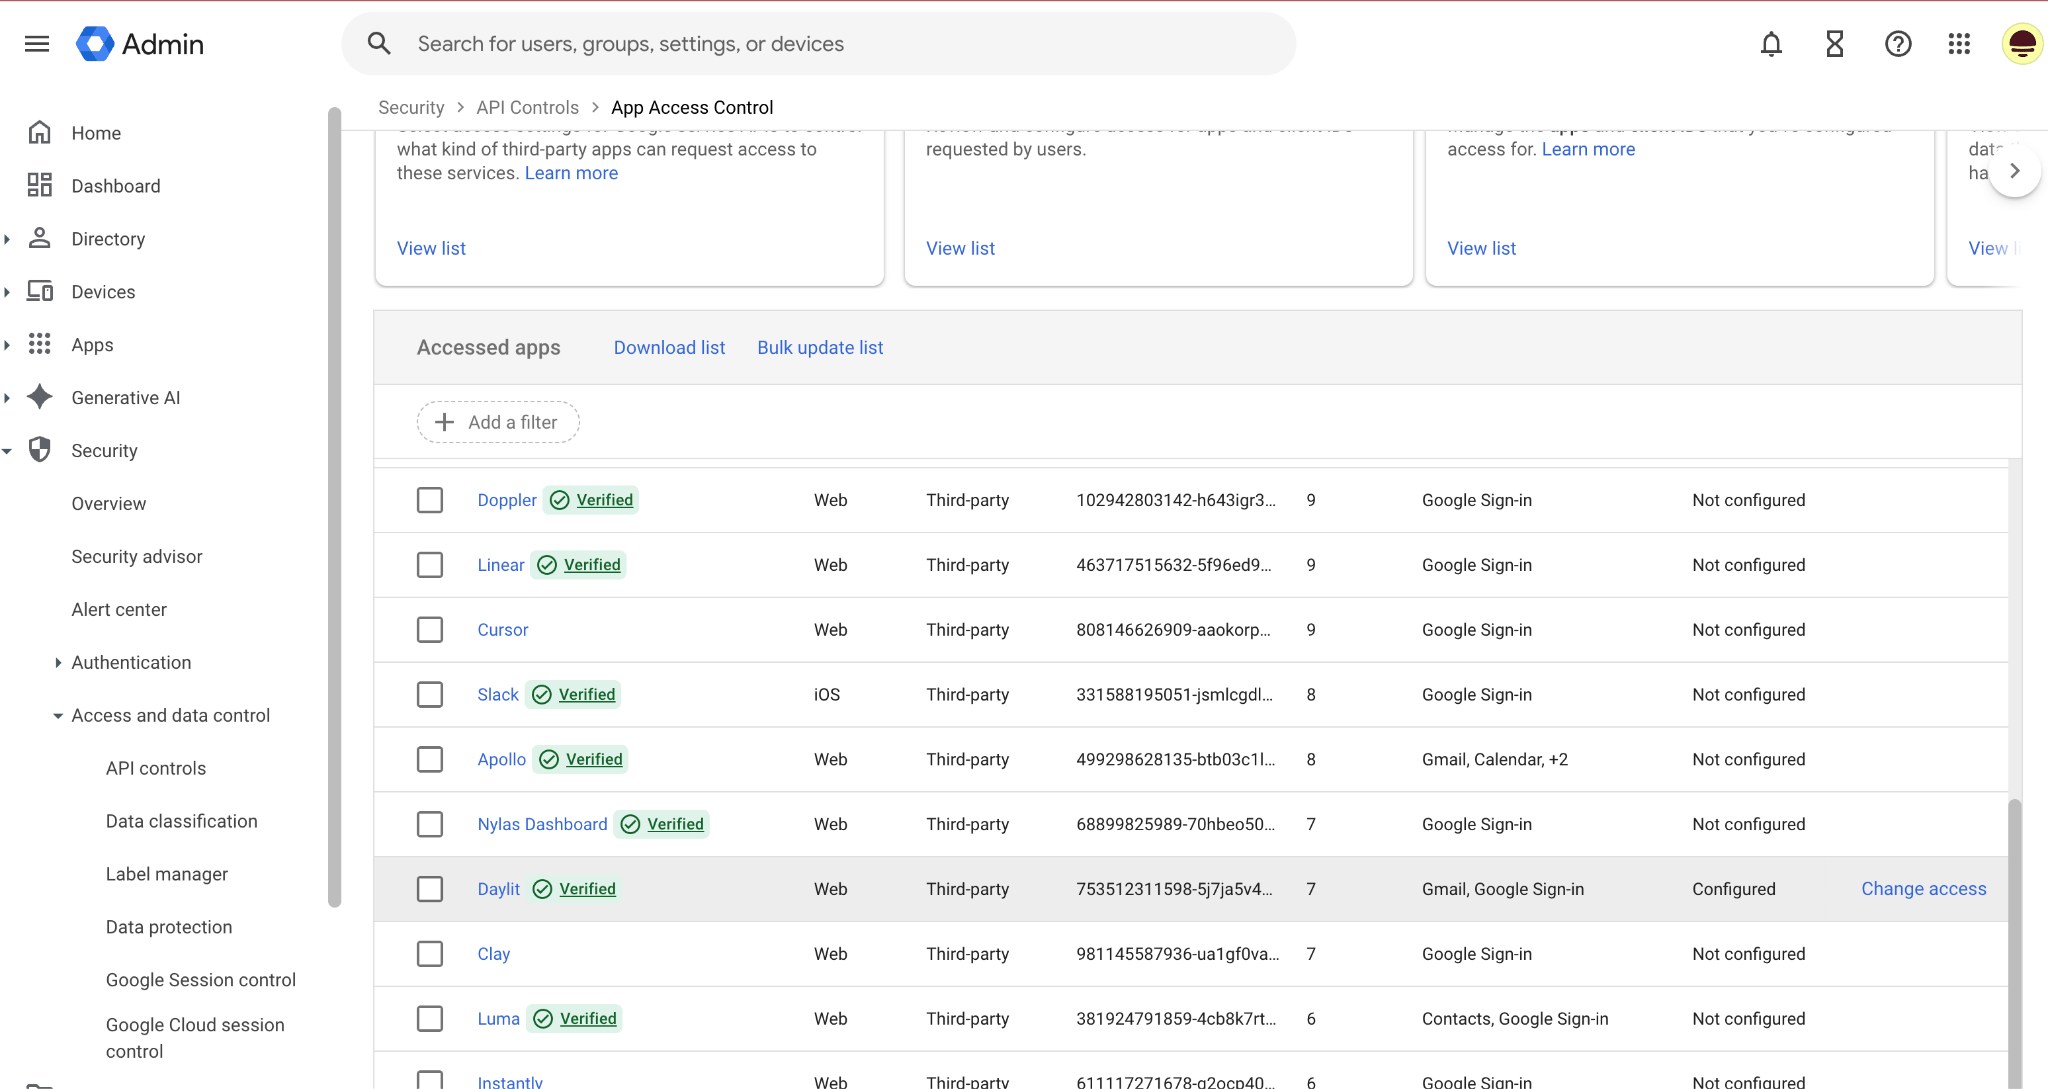
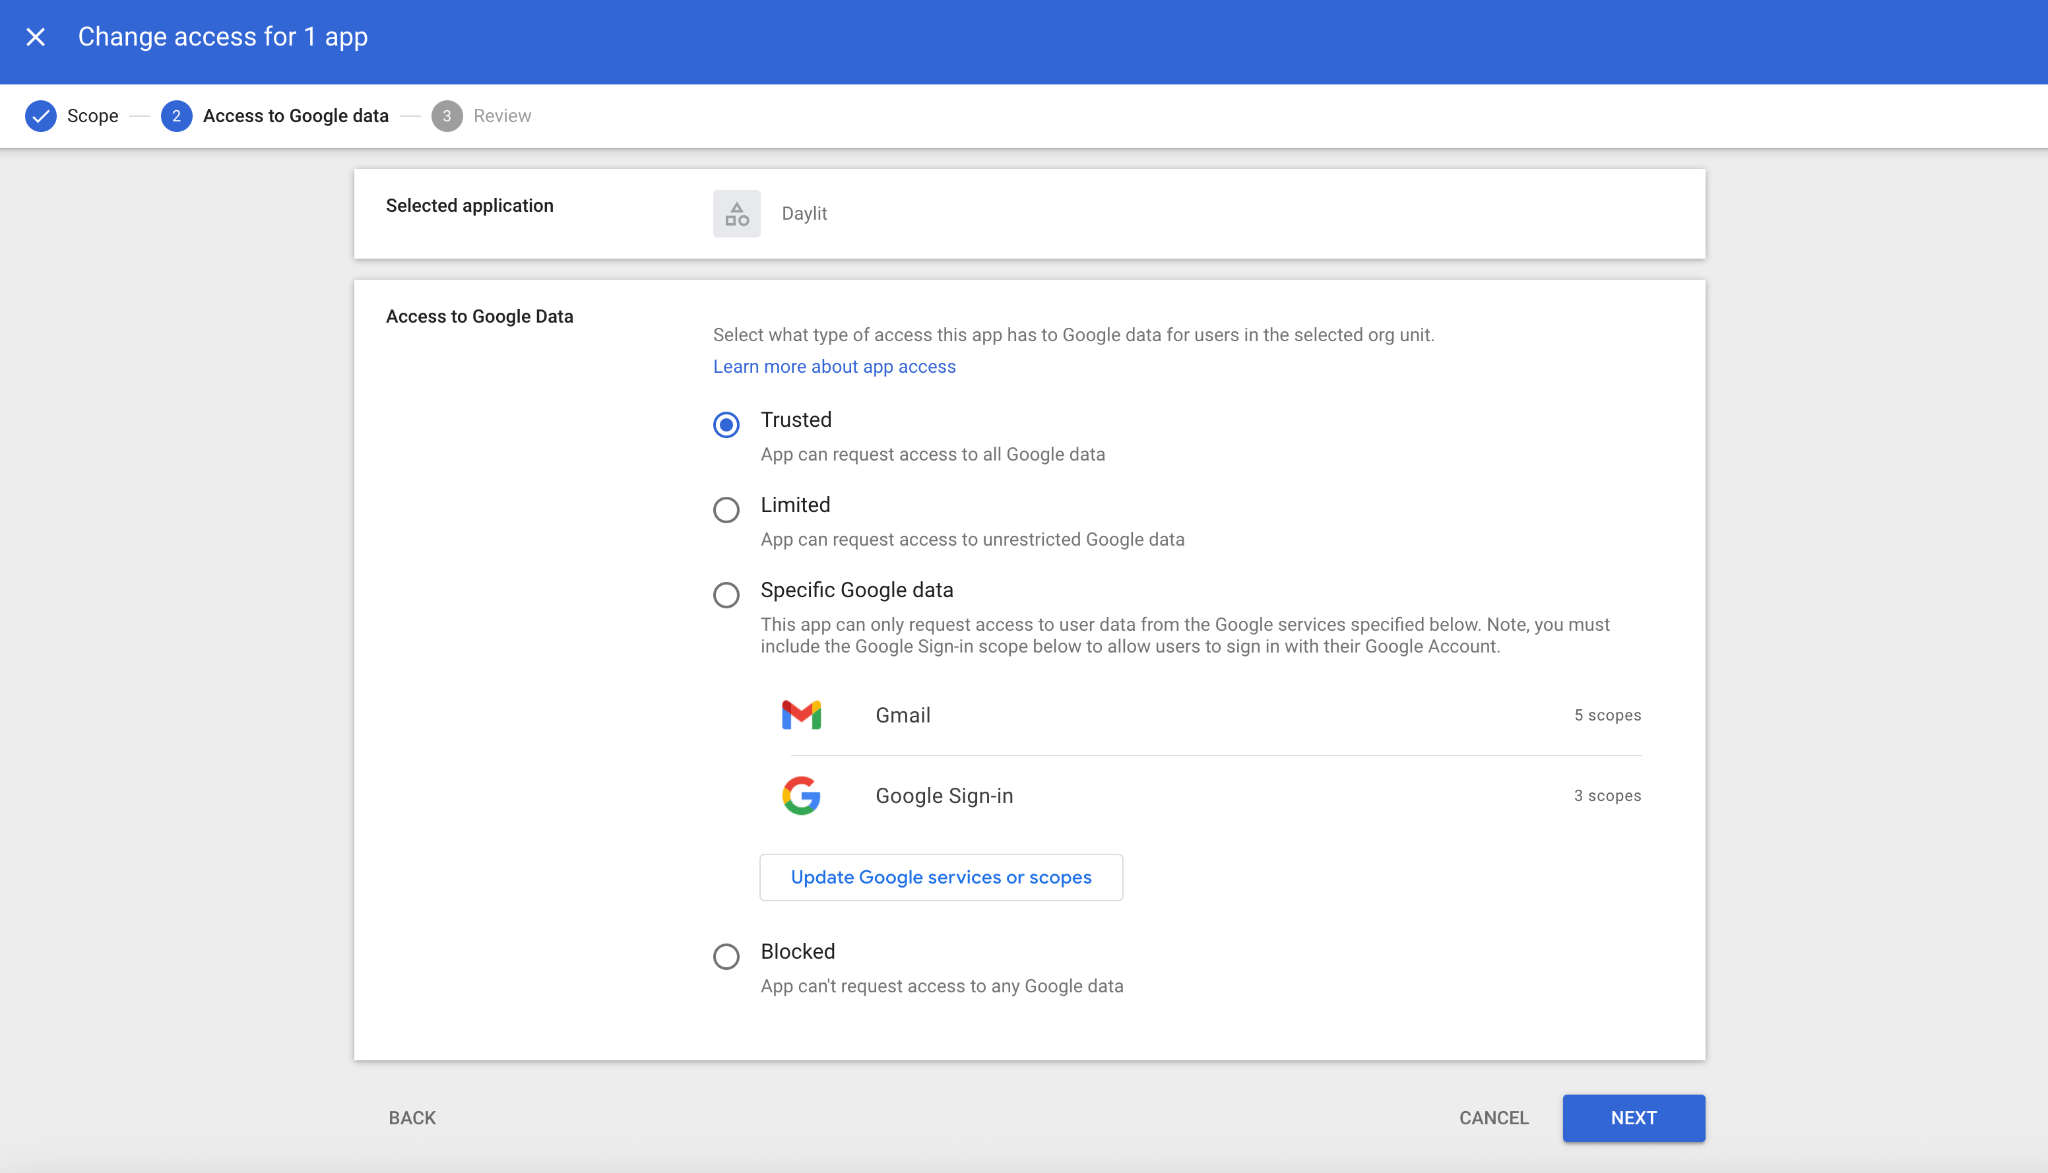
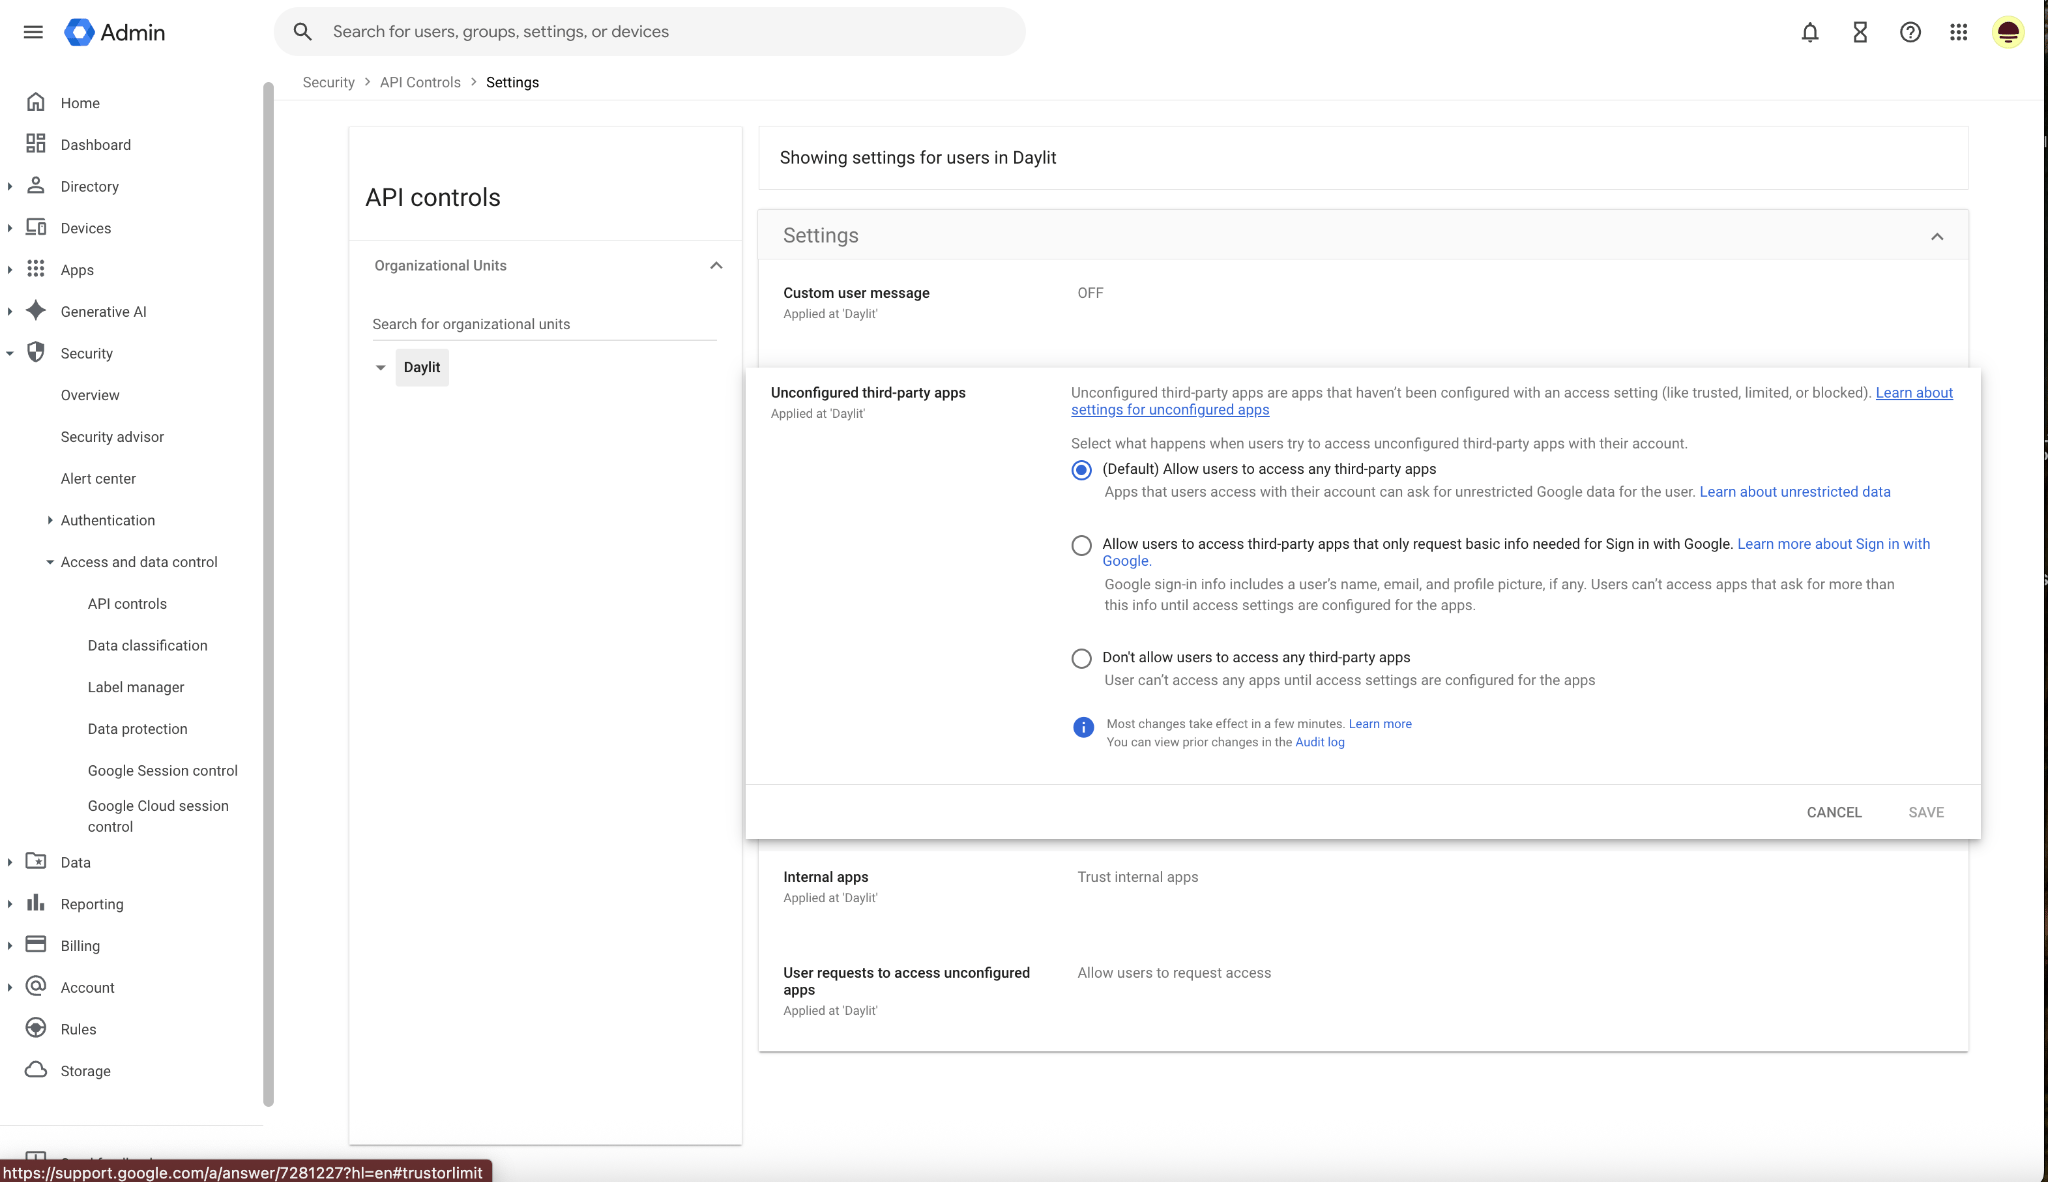
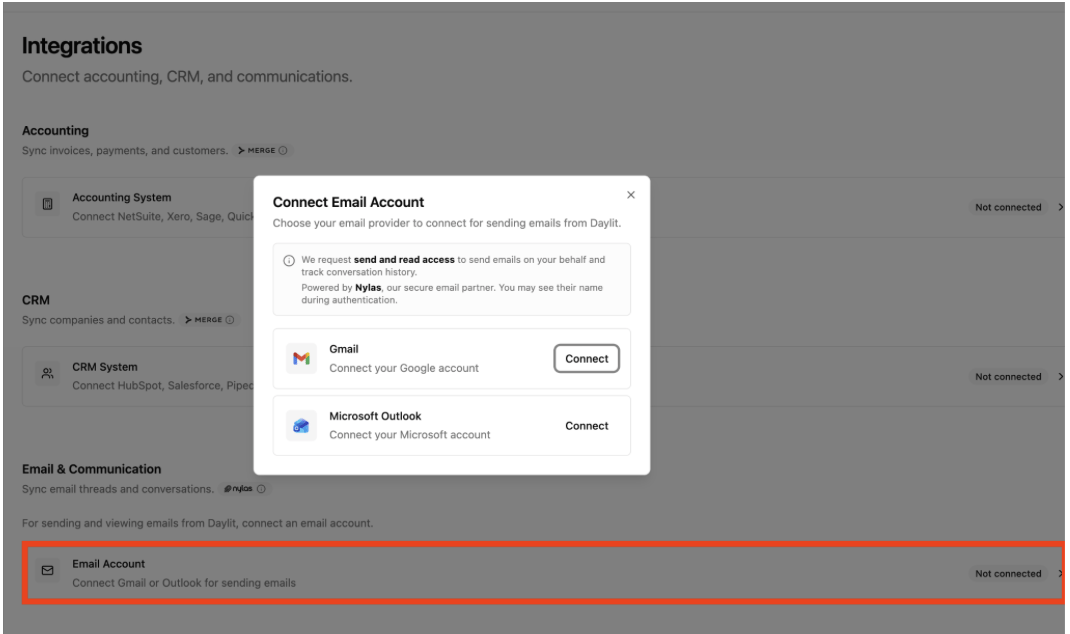
Connect an email account
Each team member connects their own email account. The address you sign in with is the one Daylit syncs and sends from — additional users can be added at any time after the initial setup.- Outlook
- Gmail
Step 1 — Connect in Daylit
Step 1 — Connect in Daylit
- On your Daylit platform, click Connect in the Email connection section.
- Select your work email system (Outlook).
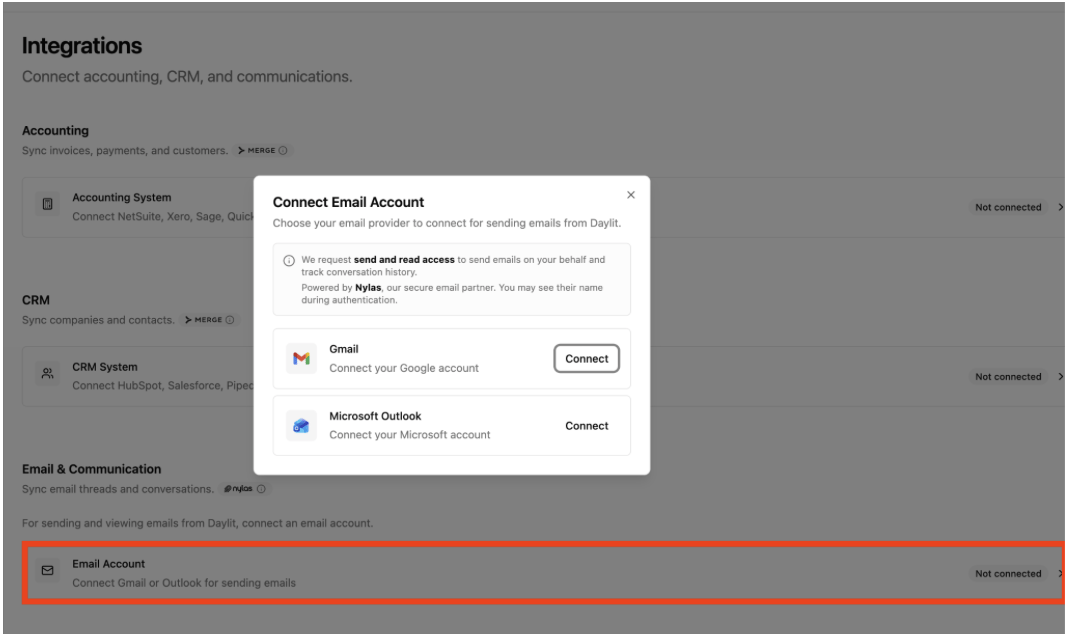
Step 2 — Configure admin consent (admin)
Step 2 — Configure admin consent (admin)
- Log in to the Microsoft Entra admin center.
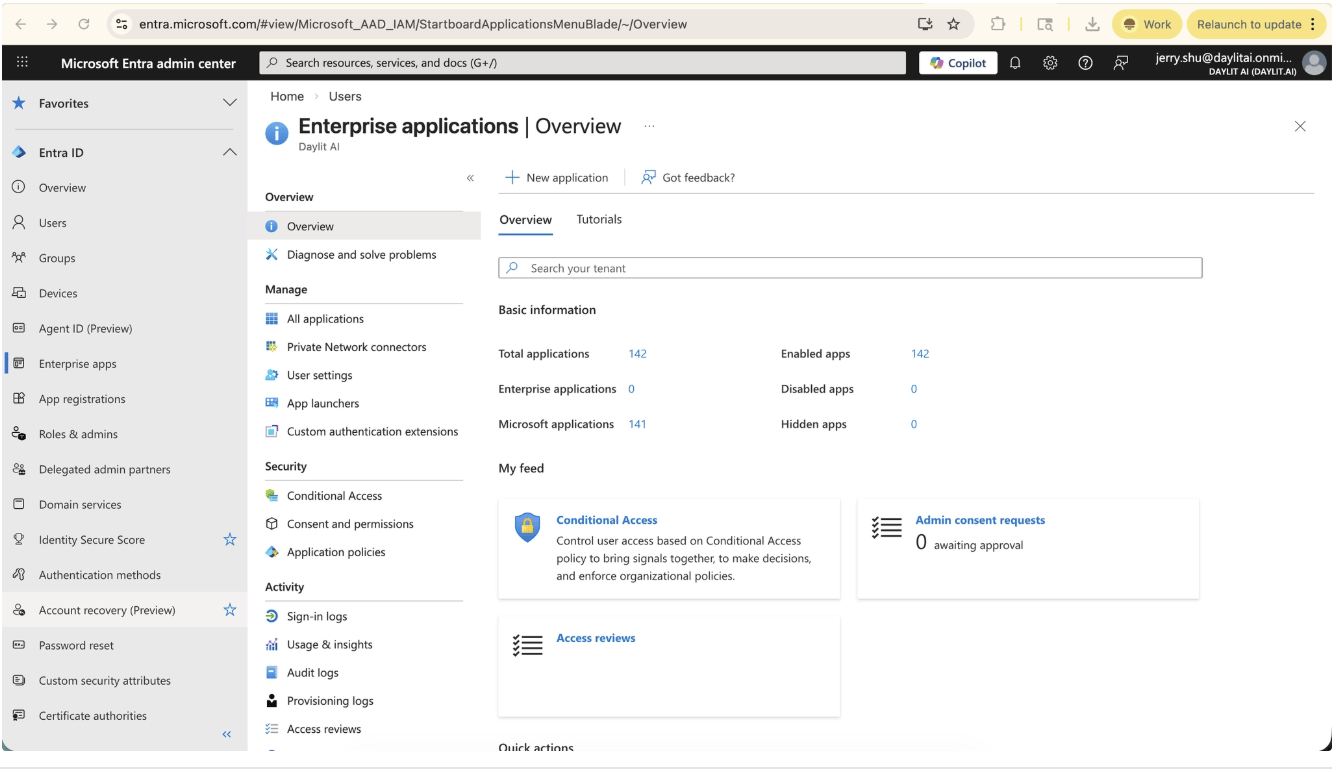
- In the left navigation, go to Enterprise applications.
- Under Security, select Consent and permissions, then go to Admin consent settings.
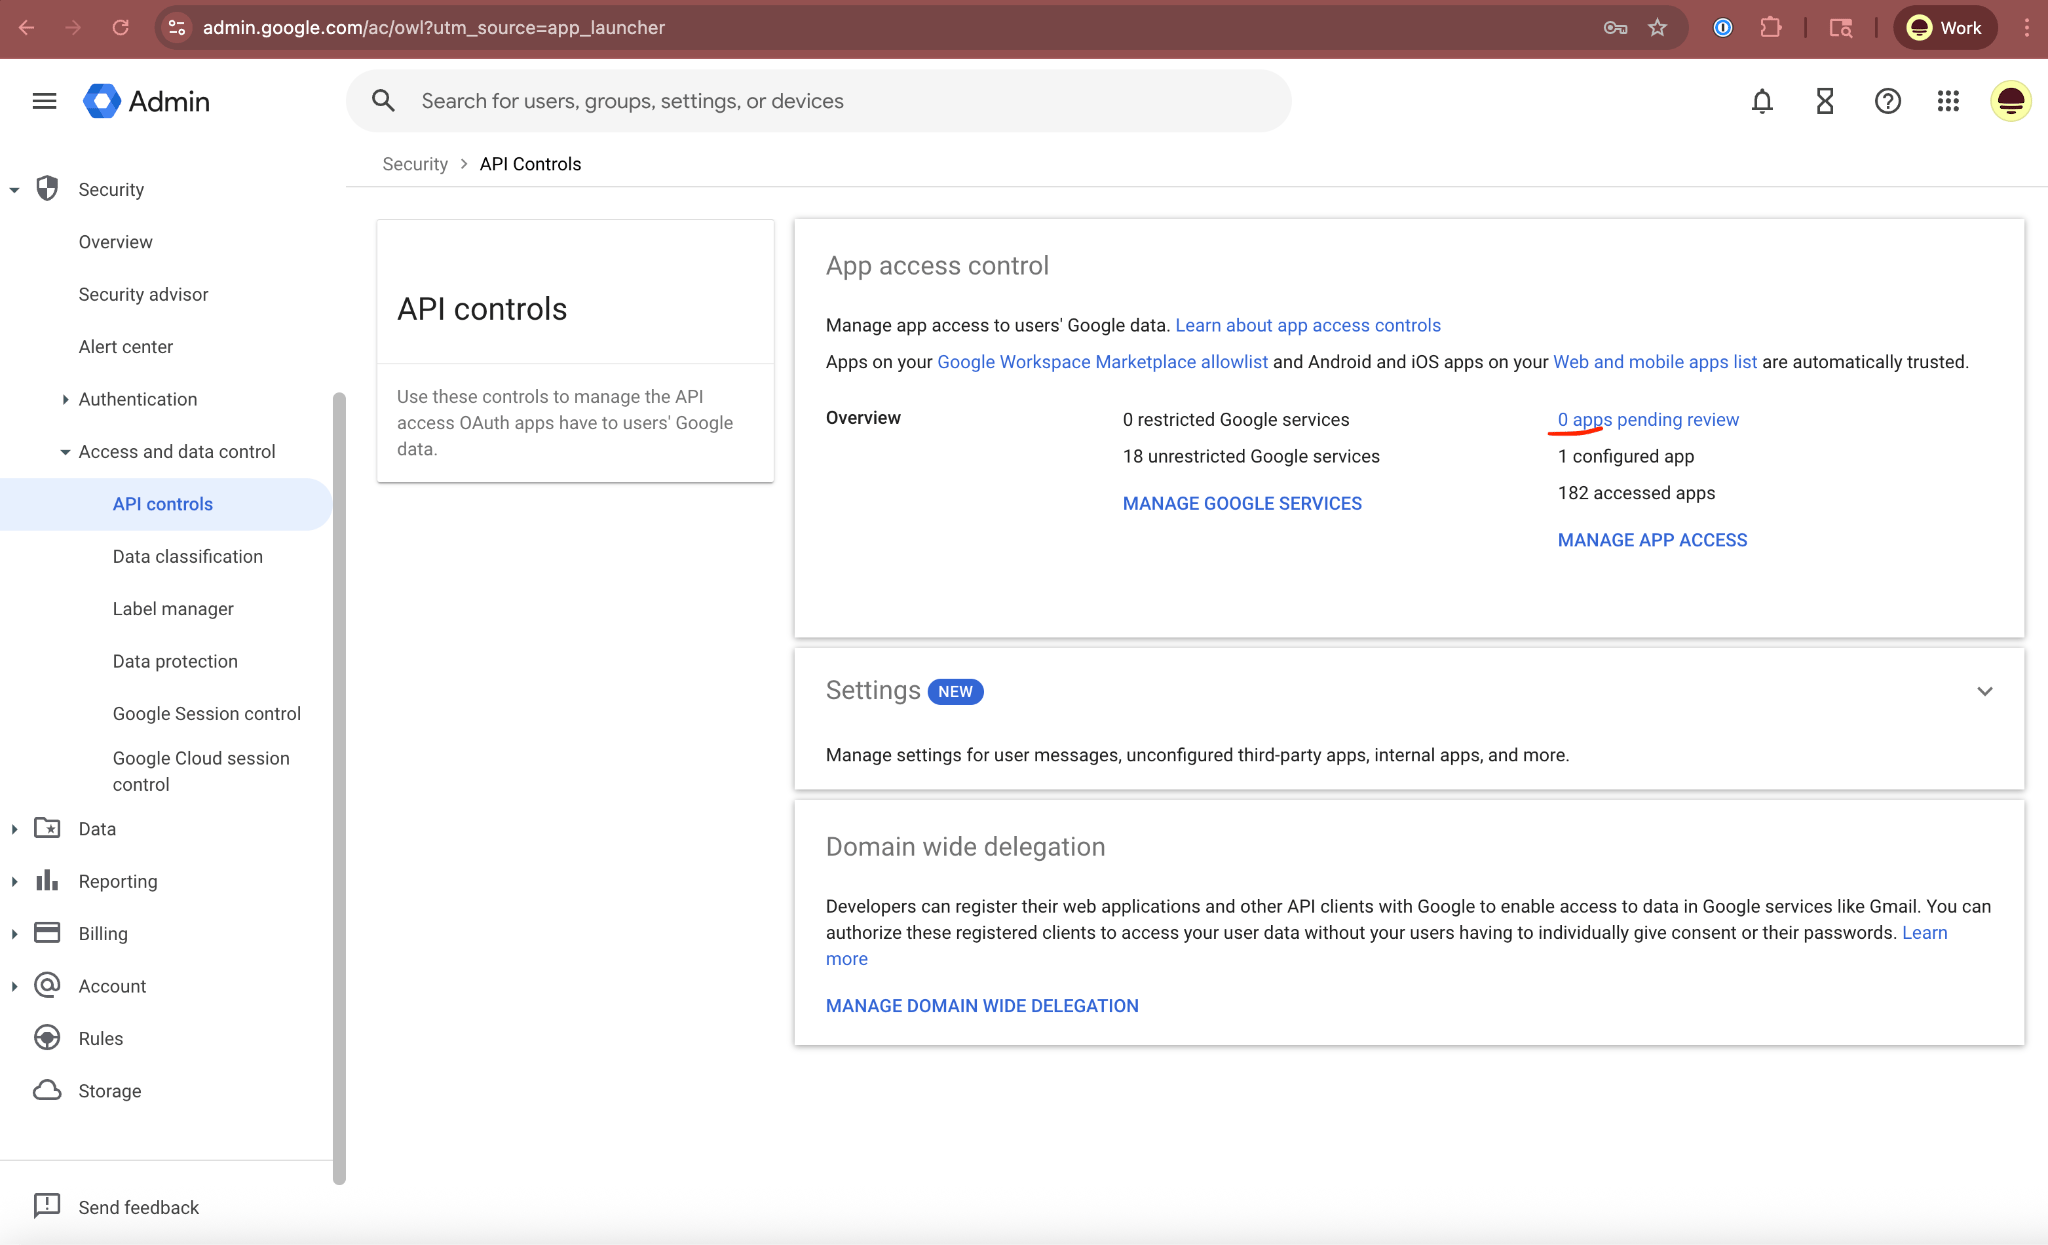
- Confirm Users can request admin consent to apps they are unable to consent to is set to Yes.
- Navigate to + Add users to add an admin user for approval review.
- Confirm the number of admin users listed for review.
- Save your setting changes.
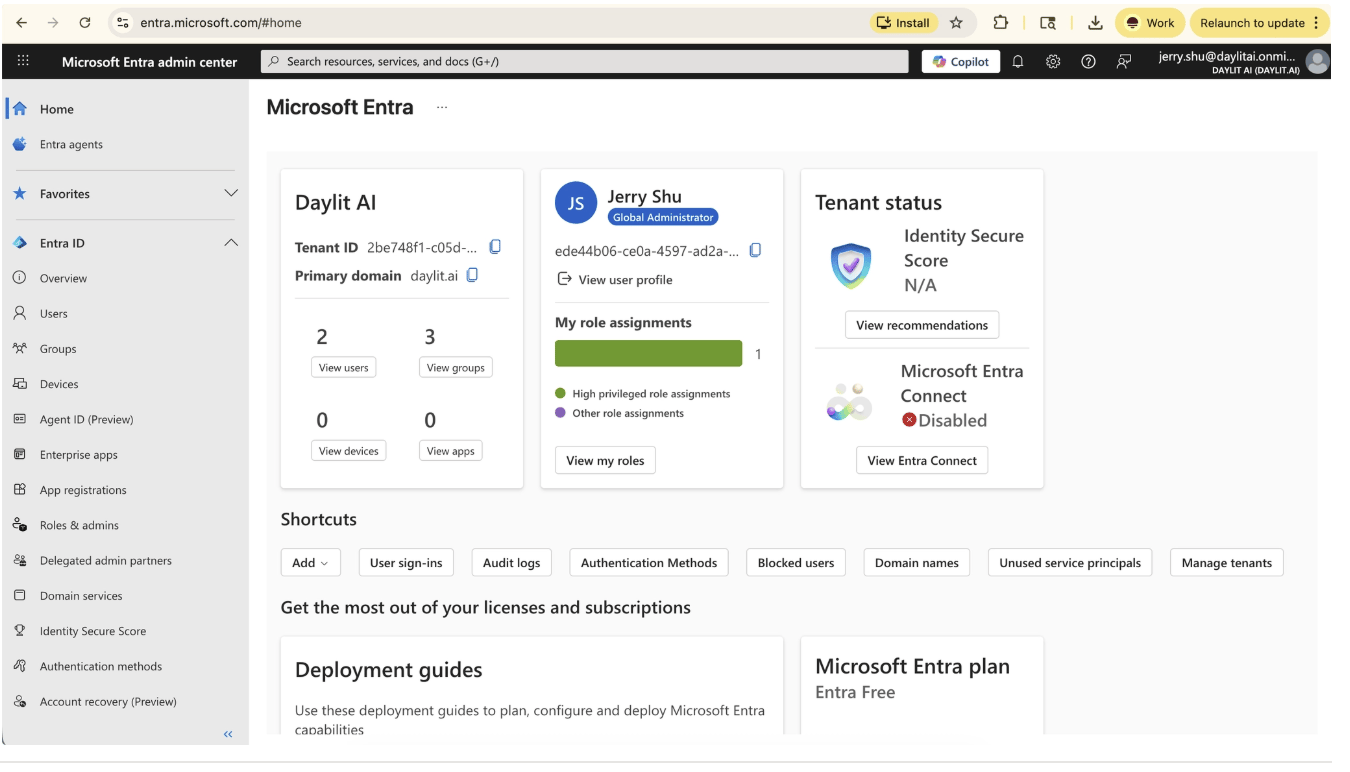
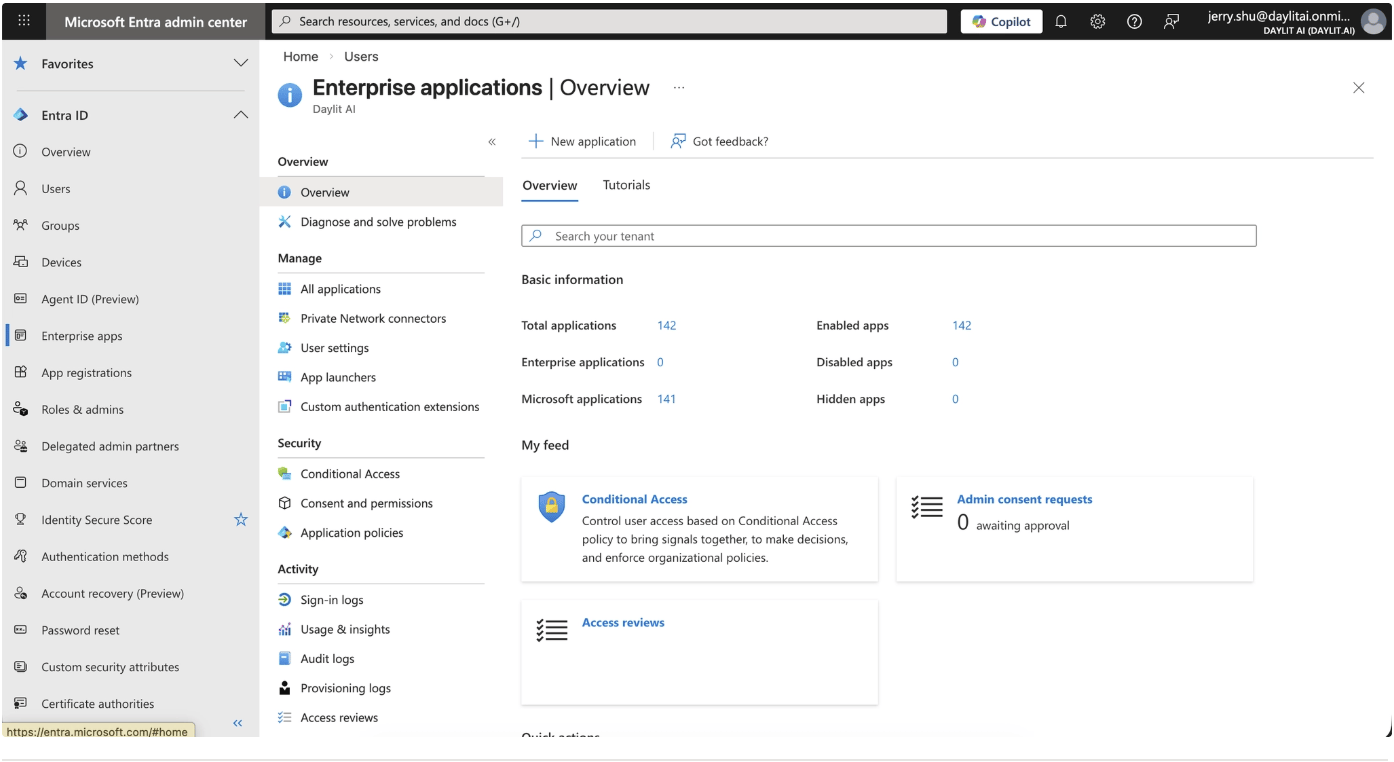
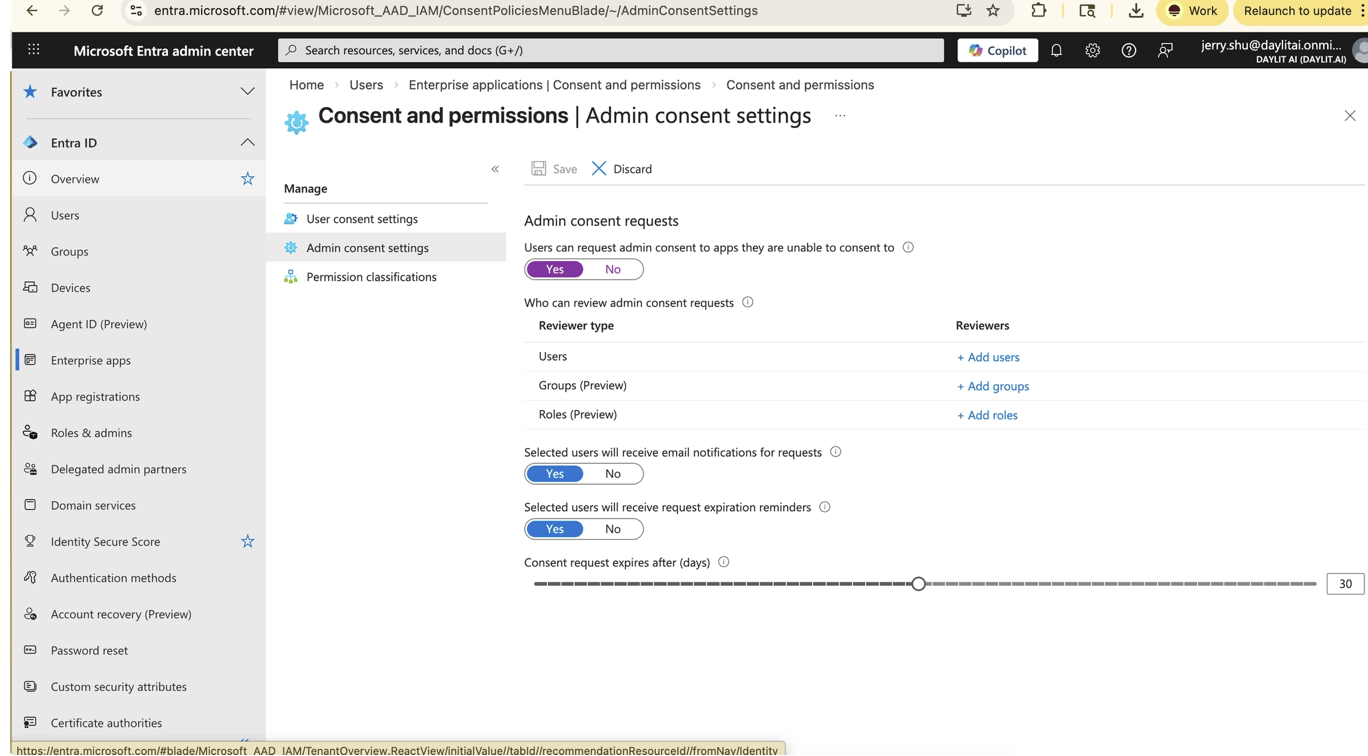
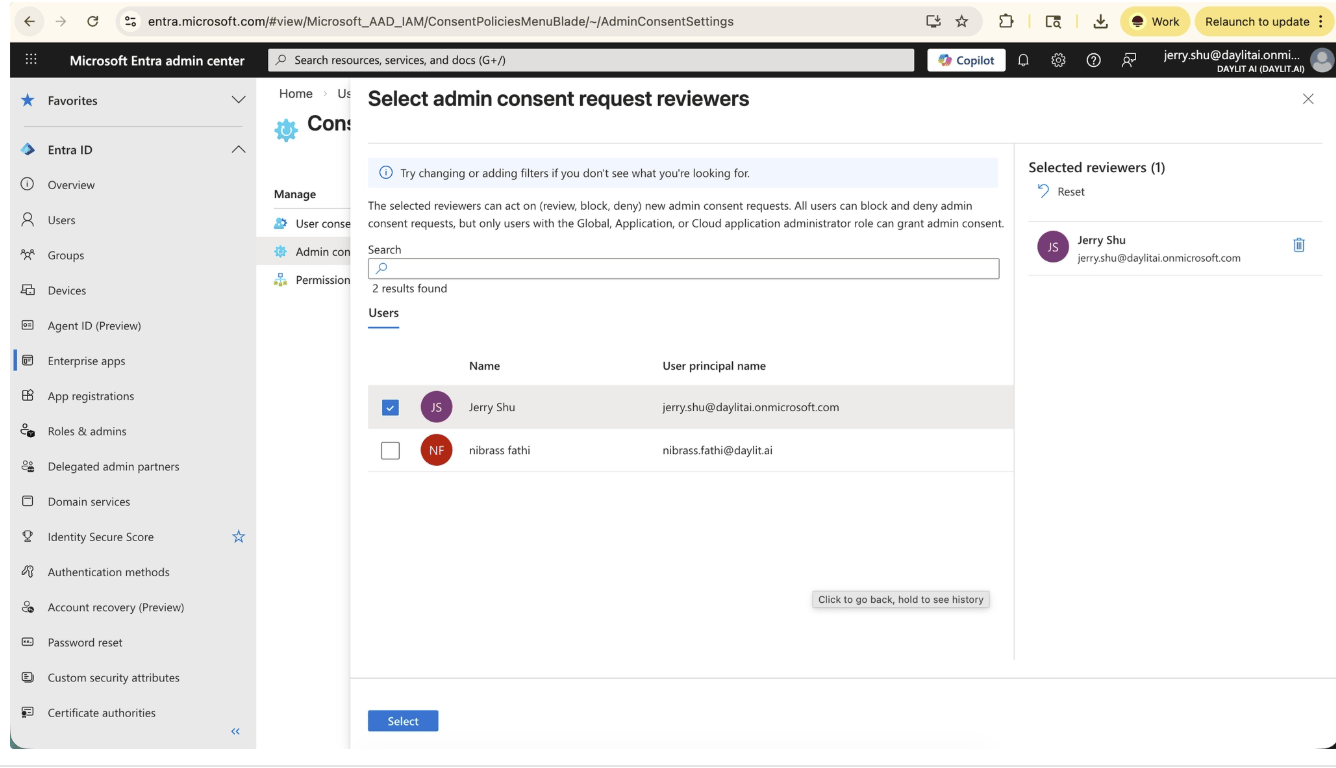
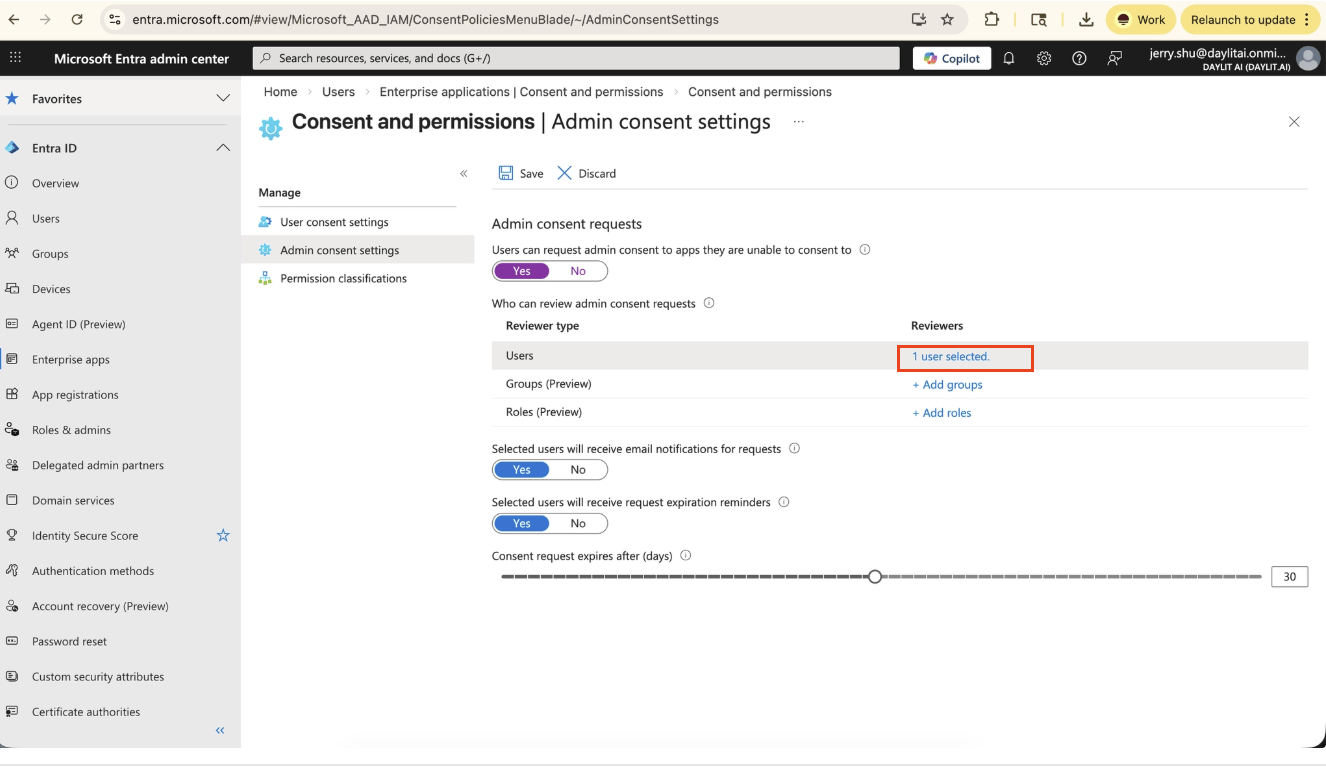
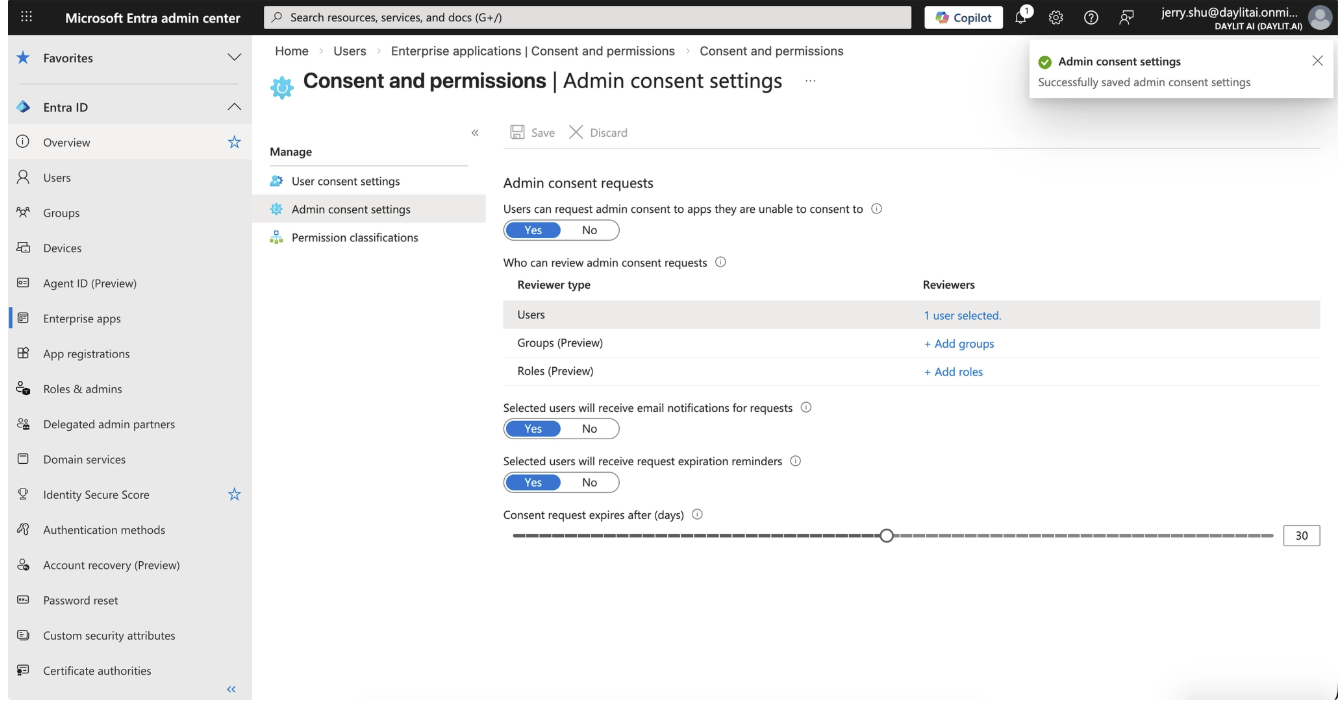
Step 3 — Toggle fix (if needed)
Step 3 — Toggle fix (if needed)
- Return to Admin consent settings in Microsoft Entra.
- Switch Users can request admin consent to apps they are unable to consent to to No, then click Save.
- Wait 5–10 minutes before asking the user to try again.
- Switch the setting back to Yes and save again.
Step 4 — Request access approval
Step 4 — Request access approval
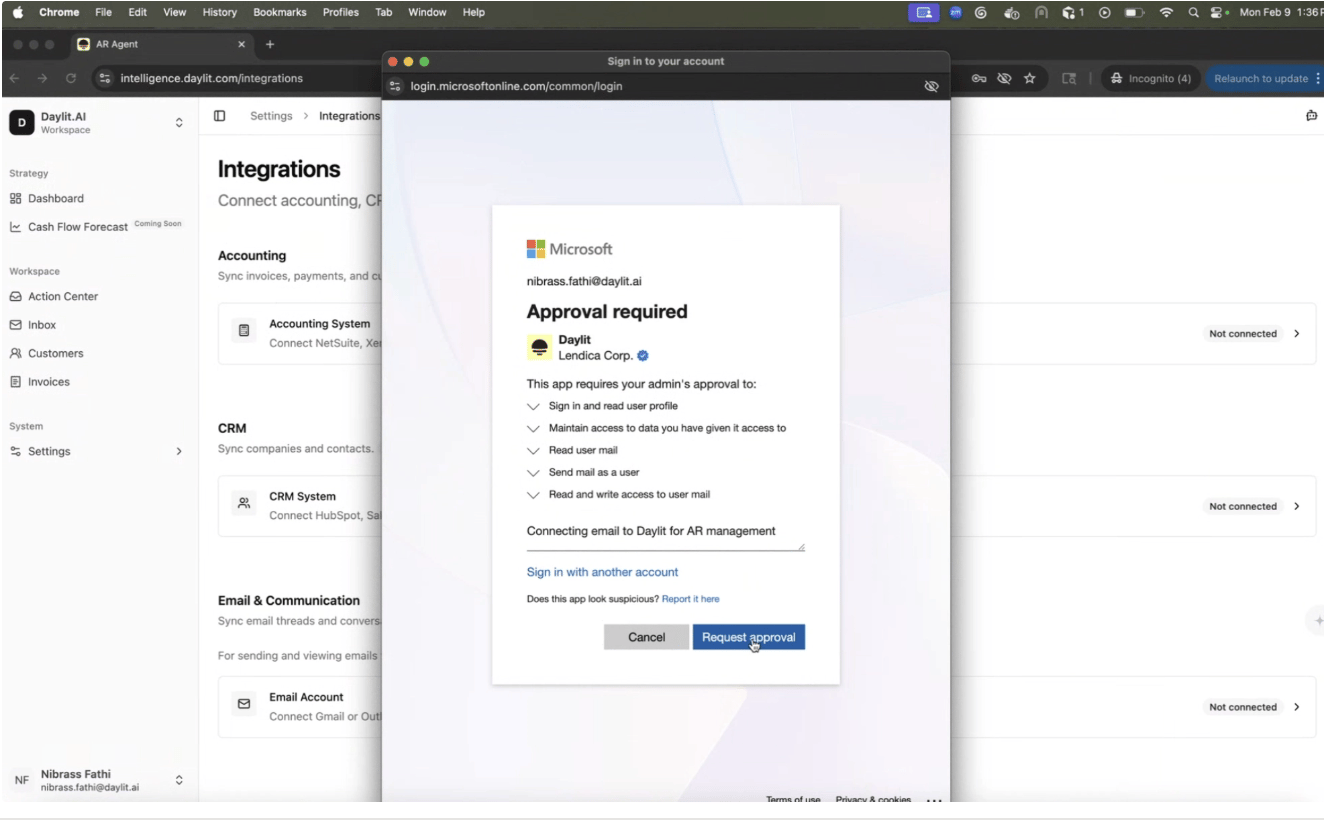
- In Daylit, go to Settings → Integrations and choose Outlook.
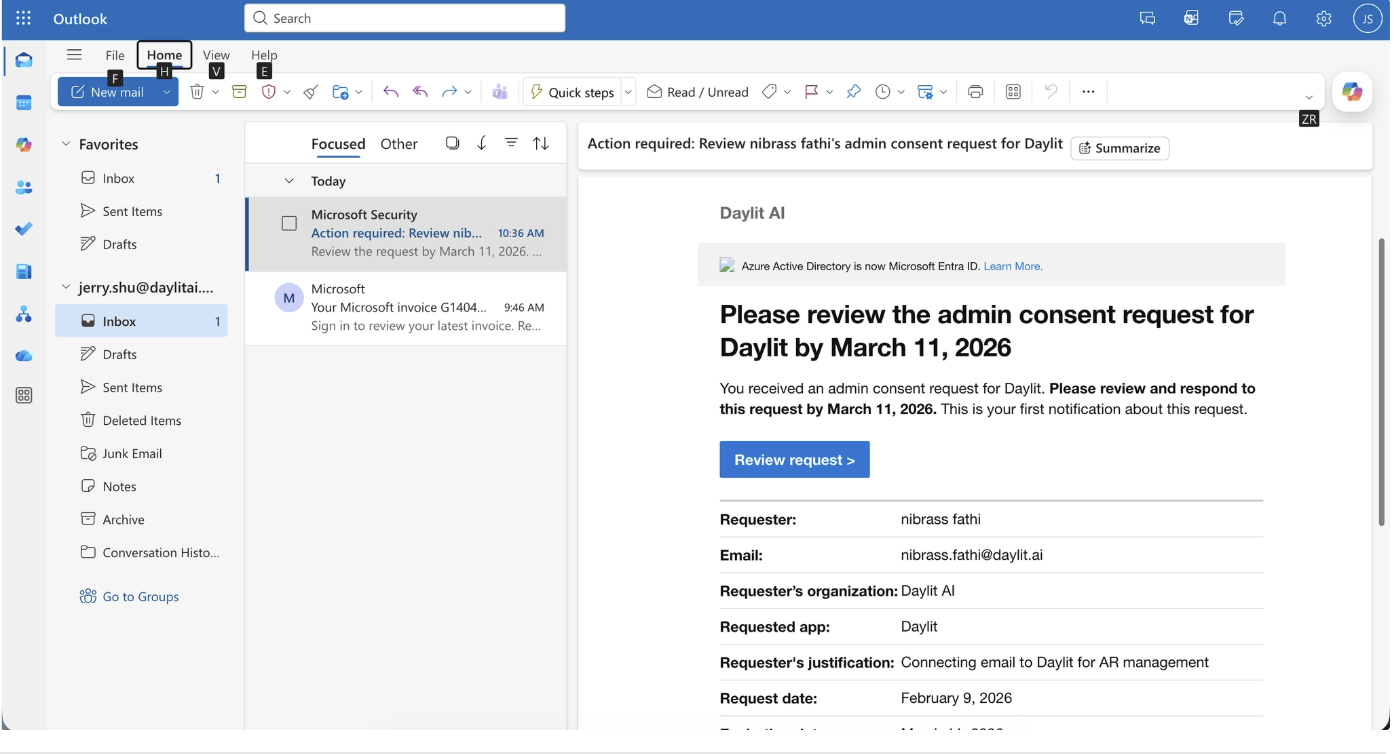
- Click Request approval. This sends a request to the admin’s inbox.
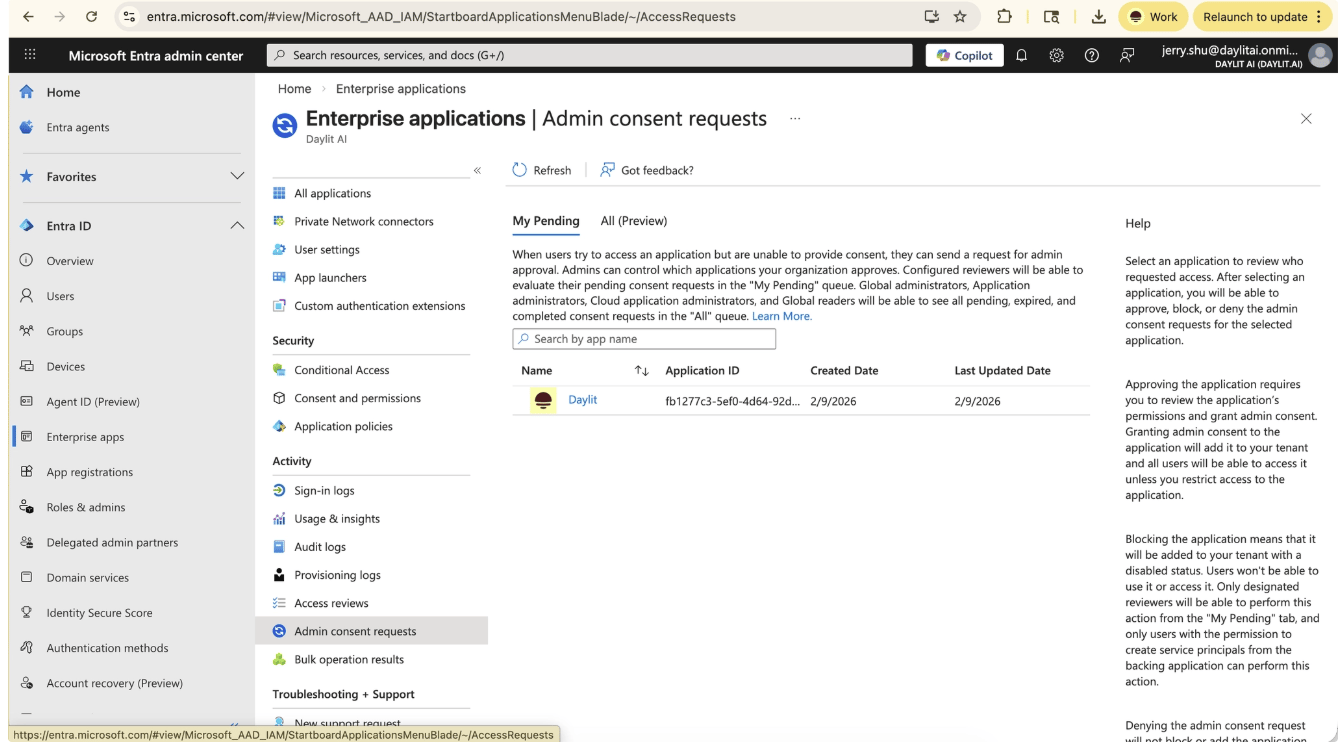
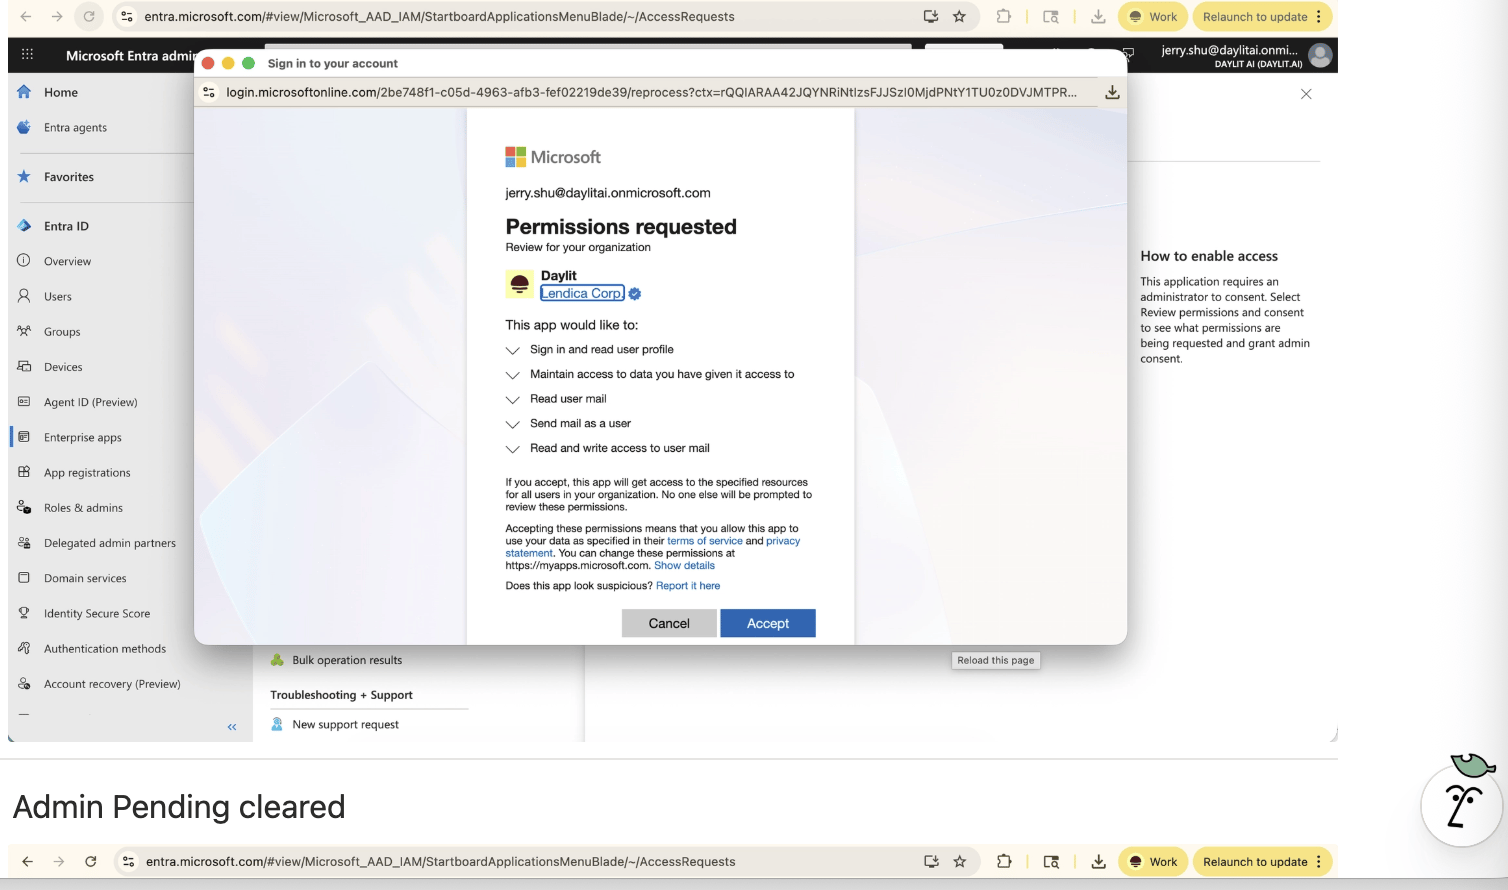
- An admin can review the request in Microsoft Entra or by clicking Review request in the notification email, then accept the request.
Step 5 — Complete the connection
Step 5 — Complete the connection
- Once your request has been approved, return to the Daylit platform.
- Restart the authentication process to complete your connection.
Connect CRM integration
CRM connections are shared across your entire workspace. Daylit syncs customer contact data from your CRM through Merge.- Salesforce
- Other platforms
Step 1 — Open CRM settings in Daylit
Step 1 — Open CRM settings in Daylit
- In your Daylit platform, go to Settings → Integrations → CRM.

Step 2 — Start the connection
Step 2 — Start the connection
- Click Connect, then select your CRM provider and click Connect again.
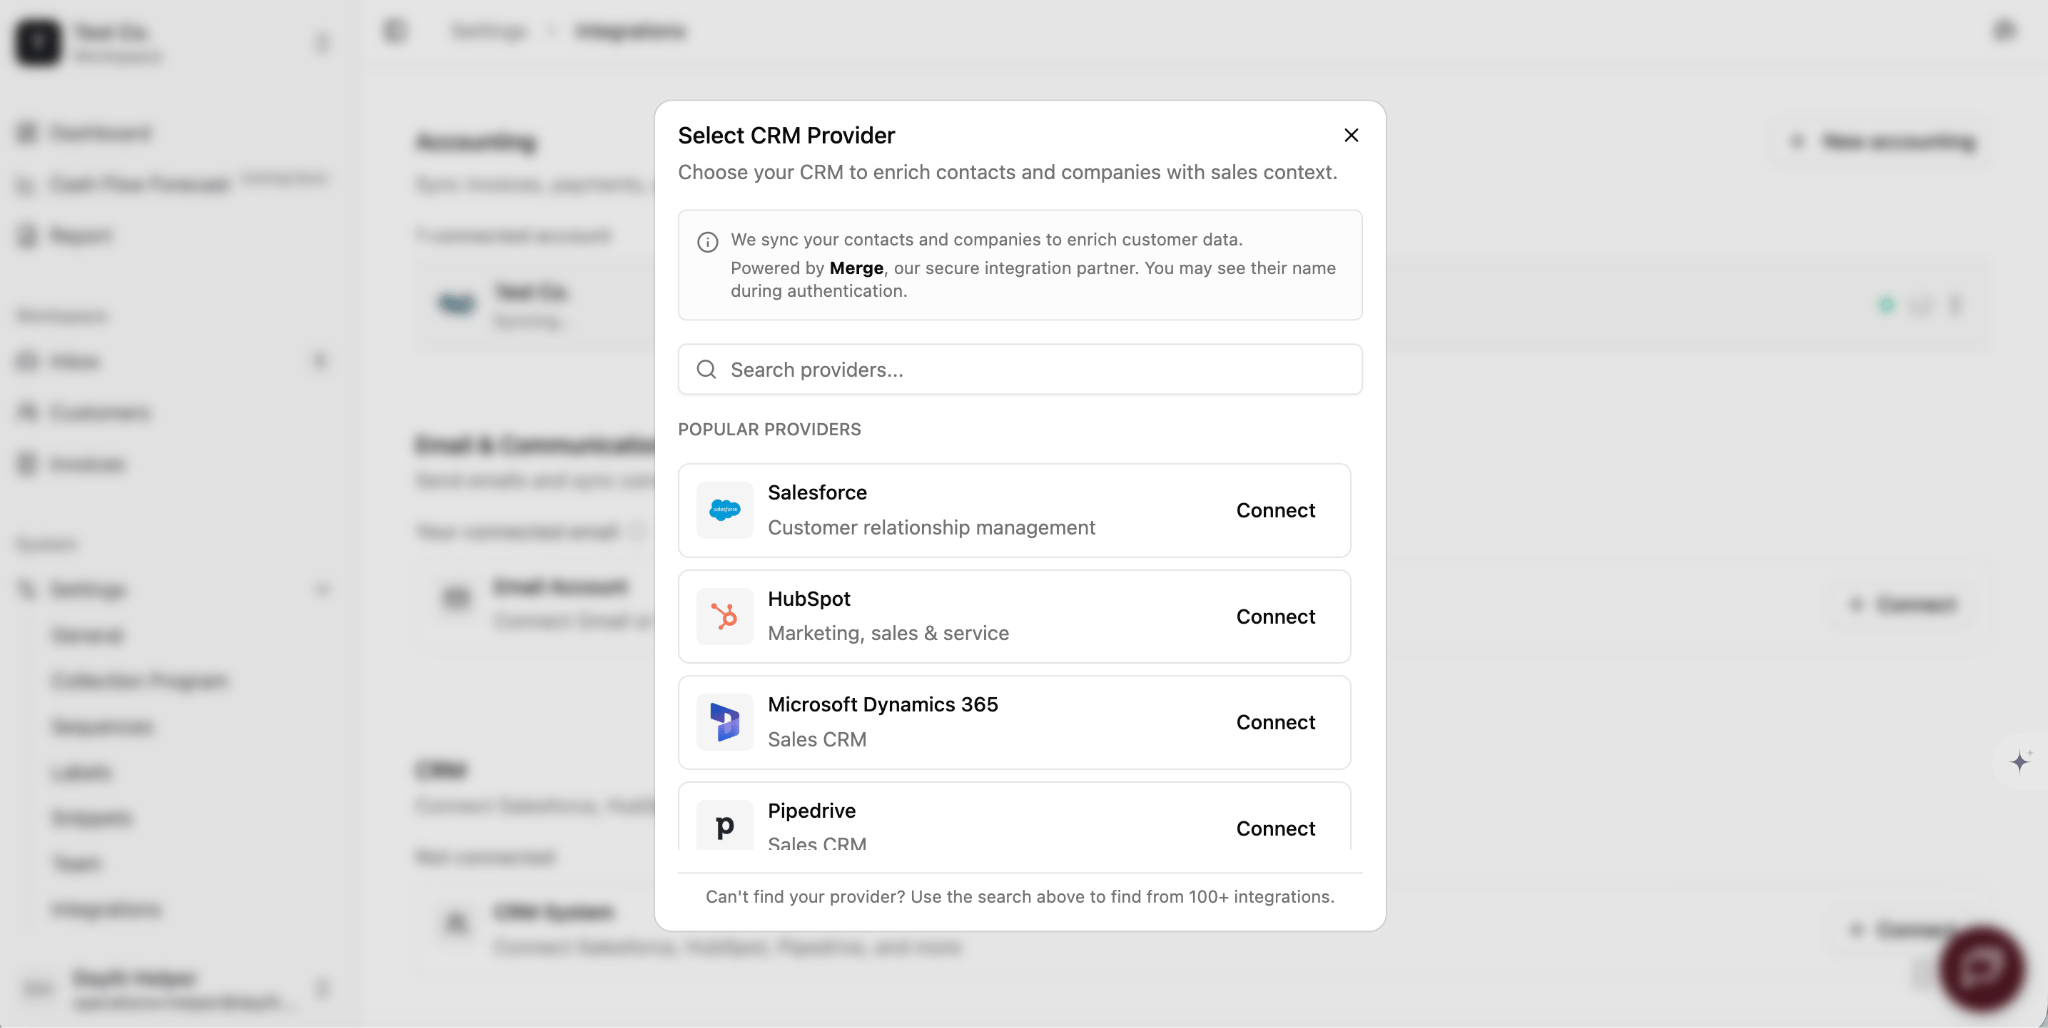
Step 3 — Choose your login method
Step 3 — Choose your login method
- On the login page, select Use my credentials (recommended).
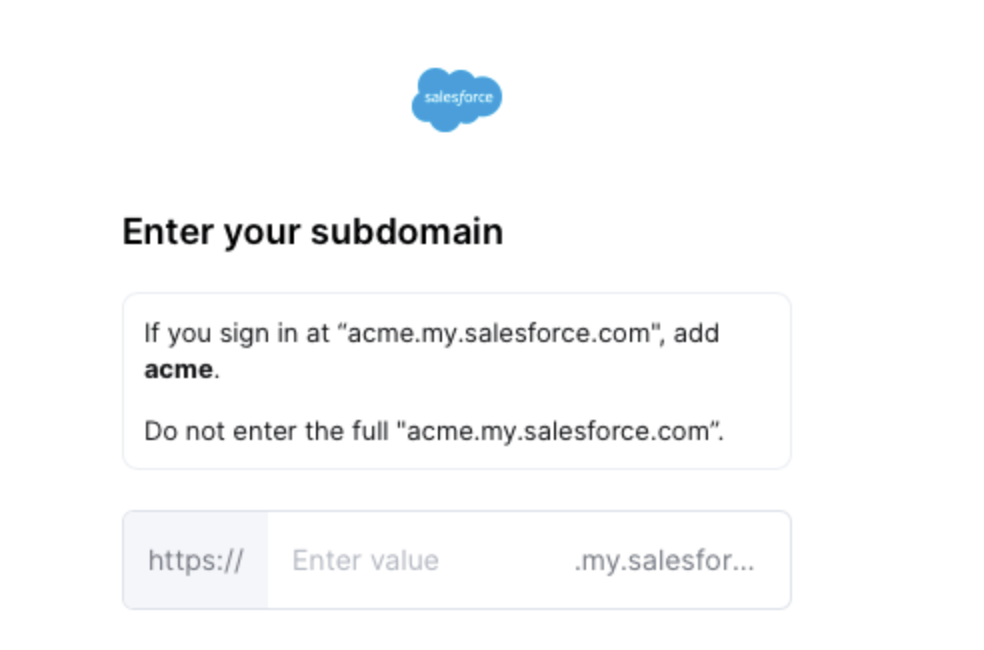
Step 4 — Find your Salesforce subdomain
Step 4 — Find your Salesforce subdomain
- Log in to your Salesforce account and locate your subdomain.
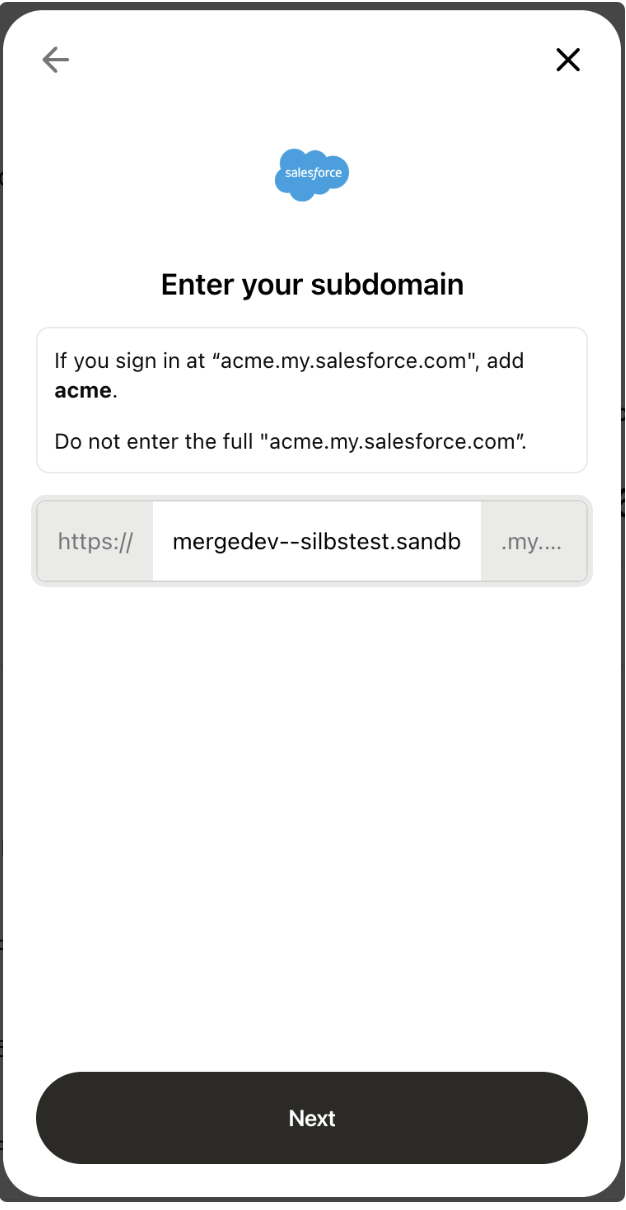
- Your subdomain is the text between
https://and.my.salesforce.comin your login URL. For example, if your URL isacme.my.salesforce.com, your subdomain isacme.
Step 5 — Enter your subdomain
Step 5 — Enter your subdomain
- Enter your subdomain into the linking flow to complete the connection.
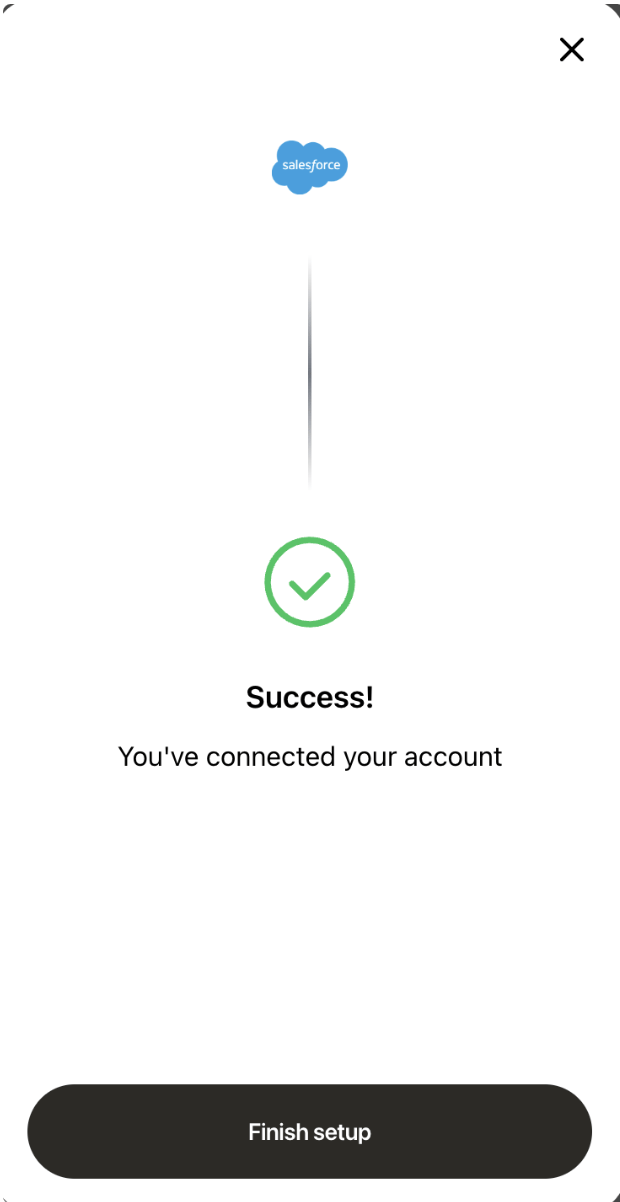
- Once submitted, your Salesforce account is connected.
Troubleshooting — Error authenticating
Troubleshooting — Error authenticating
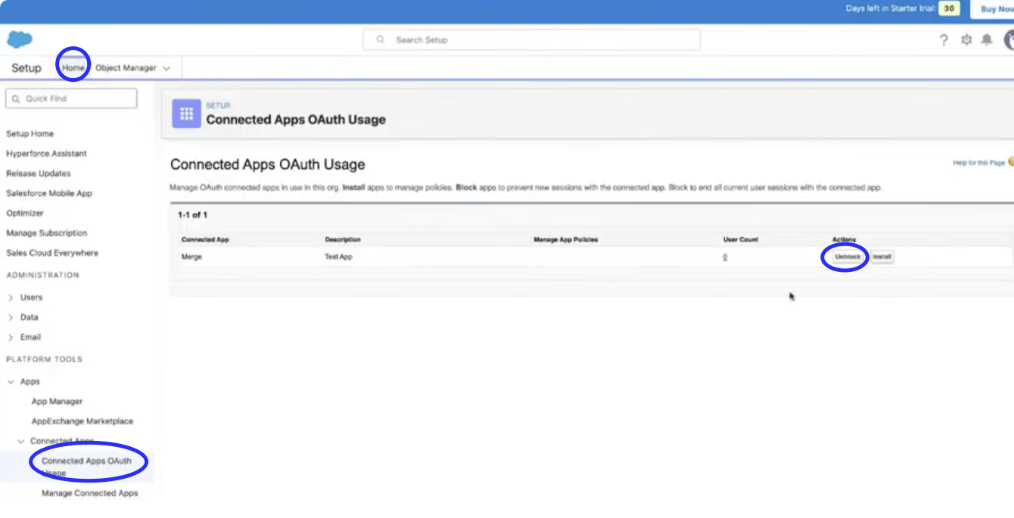
- A Salesforce admin should go to
https://{your-subdomain}.my.salesforce-setup.com/lightning/setup/ConnectedAppsUsage/home, replacing{your-subdomain}with the subdomain from Step 4. - Locate the Merge connected app in the list. If it appears as blocked, click Unblock in the Actions column.
- Enter the username and password you use to log in to Salesforce.
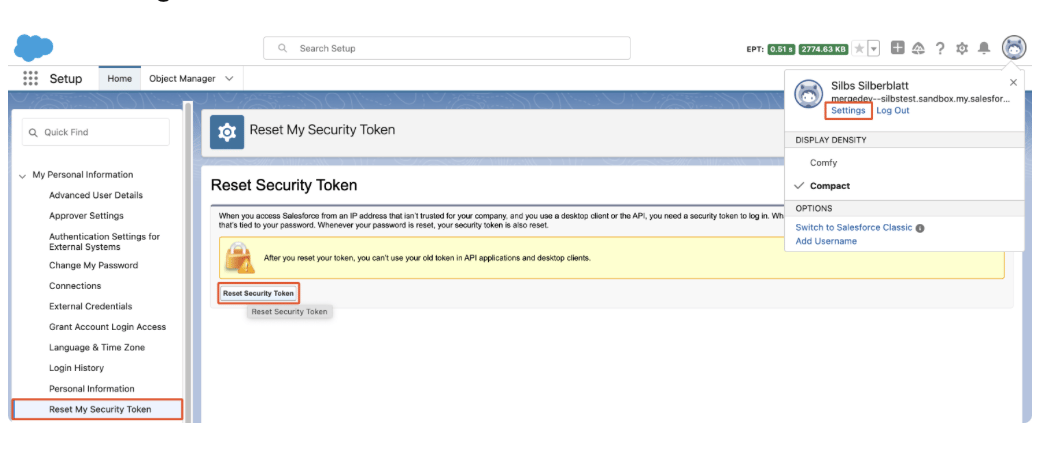
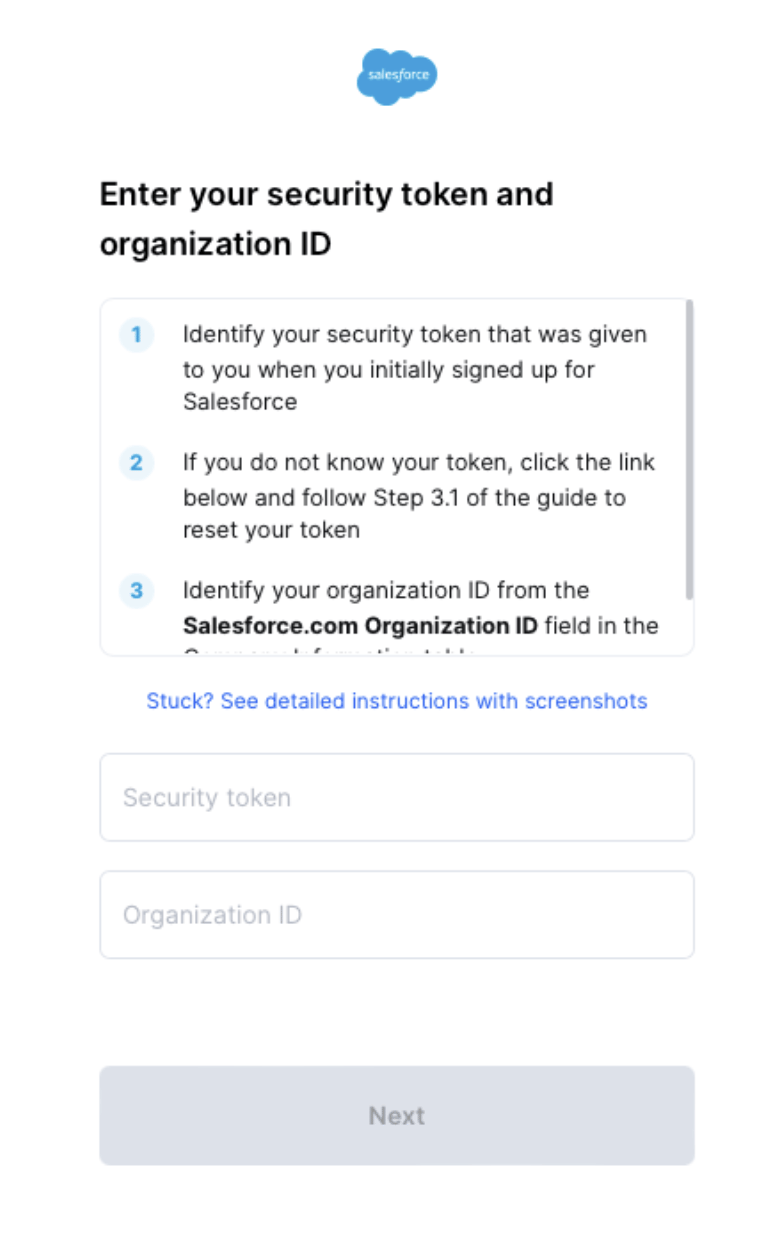
- Locate your Security Token. It was sent when you first signed up with Salesforce. If you no longer have it:
- From your personal settings, type Reset in Quick Find and select Reset My Security Token.
- Click Reset Security Token. A new token is sent to the email address on file in your Salesforce personal settings.
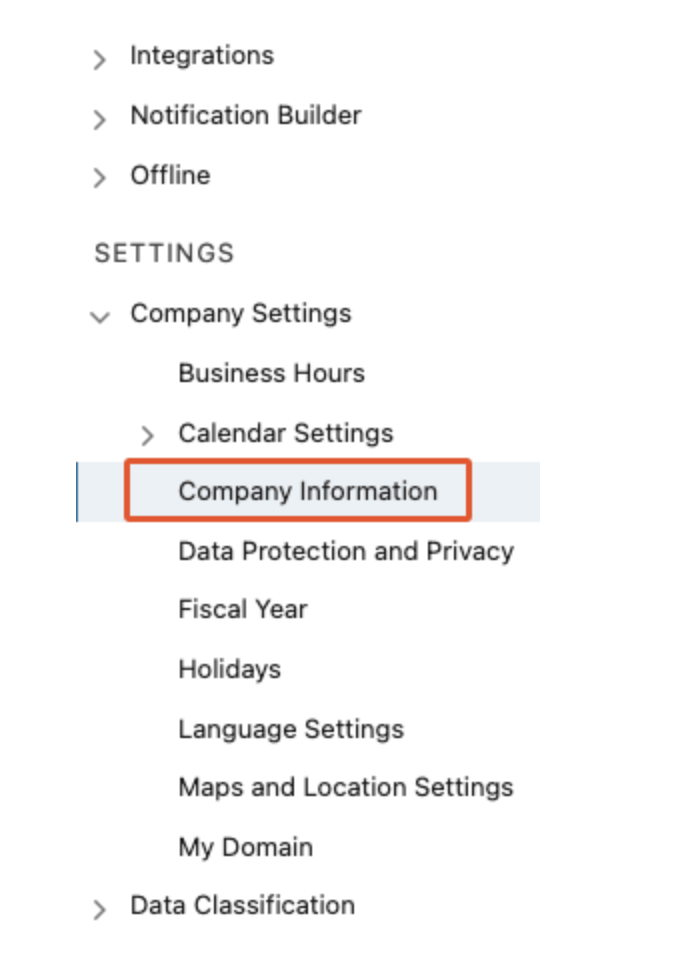
- Find your Organization ID:
- Classic: Setup → Administer → Company Profile → Company Information
- Lightning: Gear icon → Setup → Company Settings → Company Information
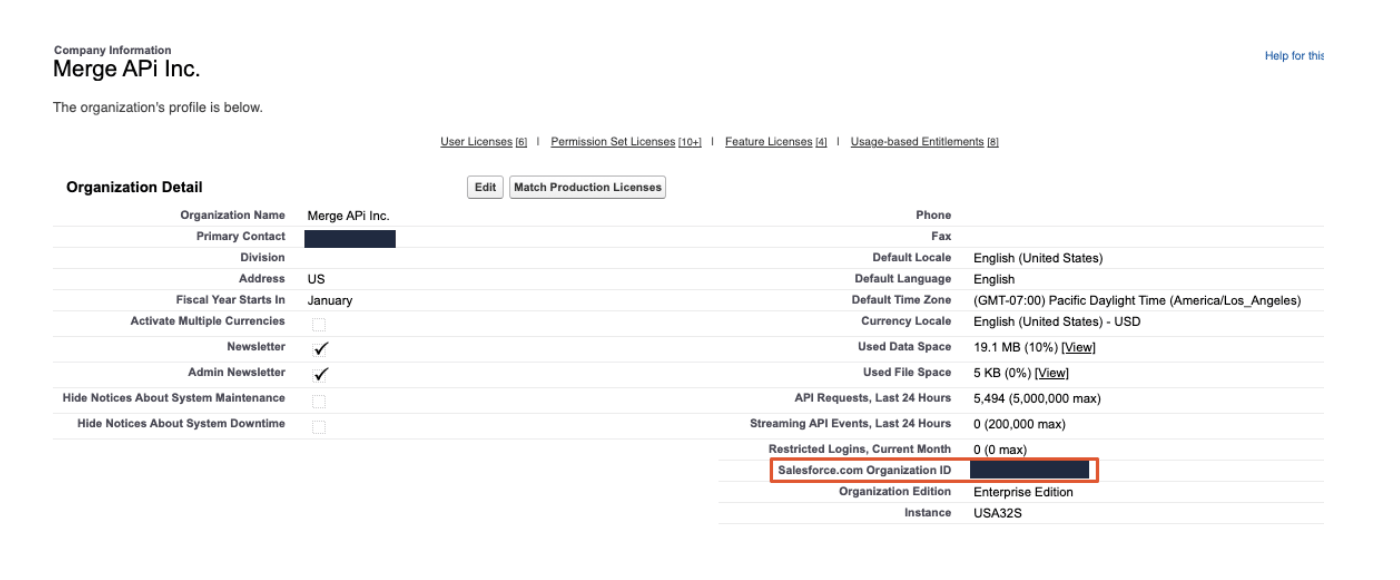
- Enter your Security Token and Organization ID into the linking flow to finish the connection.
View sync status
After connecting an integration, the connection card on the Integrations page shows the current sync status:Trigger a manual sync
If you want to pull in the latest data immediately rather than waiting for the next scheduled sync:- On the Integrations page, find the connection you want to sync.
- Click the Sync button on the connection card.
- Daylit queues an incremental sync. The status updates to Syncing while it runs.
Disconnect an integration
- On the Integrations page, find the connection you want to remove.
- Click the actions menu on the connection card and select Disconnect.
- The connection is immediately deactivated. If it was an email connection, any sequences or collection programs using that mailbox as the sender are automatically cleared.
Reconnect a disconnected integration
If a connection shows Invalid or Reauth required, or you previously disconnected it:- On the Integrations page, find the inactive connection (it may appear in a collapsed Disconnected section).
- Click Reconnect on the connection card.
- Complete the authentication flow again. Daylit restores the connection and resumes syncing.
Troubleshooting
The provider window does not open
The provider window does not open
An accounting sync is stuck or invalid
An accounting sync is stuck or invalid
Data is missing after sync
Data is missing after sync
Email setup requires admin approval
Email setup requires admin approval
Shared sending and mailbox BCC
For email connections you own, you can configure two optional settings on the connection card:- Allow teammates to send from this mailbox — When enabled, other team members can select your email address as the “From” sender in the email composer. Your other email settings remain unchanged.
- Mailbox BCC — Add up to 10 addresses that are automatically BCC’d on every email sent from your mailbox, including emails sent by teammates through shared sending.
Related pages
- Quickstart — Complete the first-time Daylit setup flow.
- Connect via SFTP — Send ERP or billing exports over SFTP when a direct integration is unavailable.
- SFTP data schema — Review required SFTP objects, file paths, and field schemas.
- Manage your team — Invite teammates and manage workspace access.
- Collection programs — Use connected invoice and customer data for automated dunning.
- Inbox — Review generated emails, calls, and ready sequence steps after integrations are connected.